
Welcome back! Yesterday I introduced you to my latest project using a free knitting pattern by the Universal Yarn Design Team, Spiral Rug, and Be Wool. Using super bulky yarn and big needles this project is a quick and cozy knit that can warm up your home decor with just a weekend of knitting.

Knitting the circular Spiral Rug by Universal Yarn with the perfect invisible cast on gives a professional look to the finished rug.
Today, I’m showing you how to cast on the Spiral Rug with a magical circular cast on that closes up the hole at the center for a professional finish to this rug. The Invisible Circular Cast On is accomplished using only knitting needles unlike the Emily Ocker cast on that requires a crochet hook. Though I know most knitters have a crochet hook handy, I thought there might be a few purists out there who only work with knitting needles, so I created a video to show you how to accomplish an invisible cast on without a crochet hook.
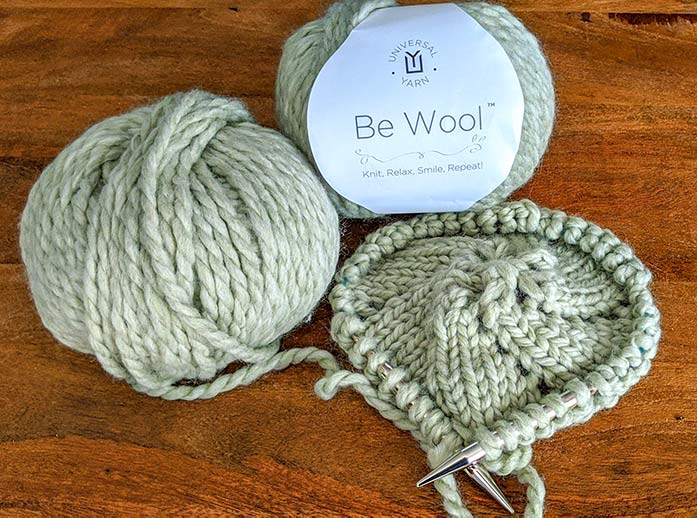
The Invisible Circular Cast On makes a perfect start to the Spiral Rug.
I used a circular needle for my video, but you can cast on your stitches with your double point needles. Once you have cast on the stitches required you can divide them evenly onto US Size 15 [10mm] Knitter’s Pride Basix Birch Double Point to begin knitting in the round. As I said in the video, you will want to knit about ten rounds before tightening the circle hole of your cast on. In fact, you can wait until the project is finished to pull the tail of the cast on. Just remember once it’s tightened it’s very hard, if not impossible, to loosen it, so tighten it slowly. If you tighten it too much you can create a kind of nipple effect in the center. Not to worry if you do! I went a little too tight on my center but was able to block it out flat again. Still, I recommend not pulling the center circle too much if you can avoid it.

A perfect beginning to a wonderful rug!
I hope this tutorial helped you start your own Spiral Rug off right. Tomorrow I’ll share with you the joys of big knits, and Thursday I’ll offer little tips and tricks to make knitting using this pattern easy-peasy. Finally, on Friday I’ll give you the finishing touches to make your rug look simply elegant!