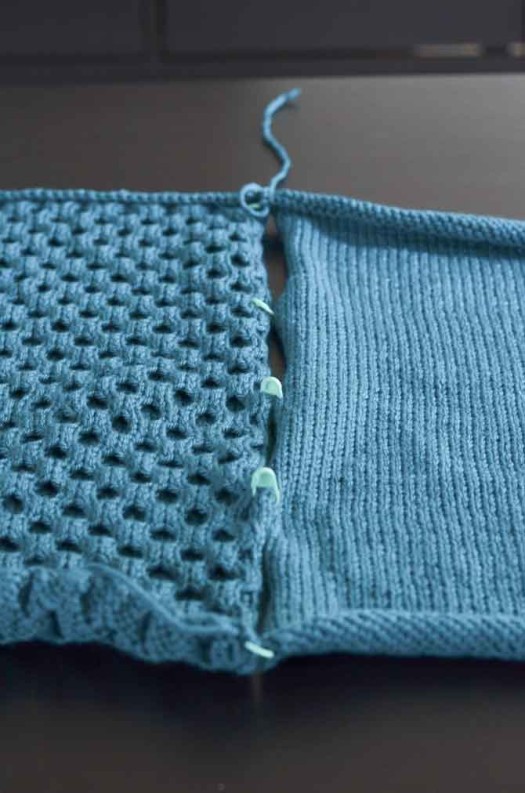
The finished pillow pieces are ready to be sewn together! 4 skeins of Uptown Worsted have been transformed.
It’s been a busy week here on the KNITmuch blog. We’ve shown all the steps and materials you’ll need for this cushion cover knitted in Uptown Worsted yarn in Sapphire colorway. 100% acrylic yarn is sturdy and easy to care for, so it makes a great choice for home accessory projects. If you spill your tea on it, not to worry! It’s machine washable.
To knit this cushion you need 4 skeins of Uptown Worsted yarn, US7 [4.5mm] needles, a cable needle, and also a tapestry needle and some stitch markers.
In today’s post we’ll review the steps to finish the cushion. If there are new skills in here for you, don’t be shy about taking the time to read up on how to do each technique. Everyone has to try these things for the first time at some point, as a knitter, so if this is your first practice, then great! You’ll learn some new skills along the way. Just be patient with yourself. A cushion cover is the perfect project to practice on.

Use stitch markers to hold your pieces together, before starting the vertical seam.

This is the vertical seam in progress. You’ll do this twice to attach the 2 pieces together at the sides.
The first step is to sew the two square pieces together at the sides, by working a vertical seam. There are good instructions for how to do this in a lot of places online, as well as your own knitting reference books if you have them at home. Here is one nice visual (with set-up image and in-progress image), a YouTube video.
First, take a few stitch markers and hold the two pieces together at the sides so you have them pieced together evenly in preparation. Work a vertical seam twice using Uptown Worsted yarn and tapestry needle, attaching the pieces together. These steps are shown in the 2 photos above.

This is the horizontal seam in progress, which you’ll do at the top and bottom of the cushion.

Stuff the cover with the pillow form insert before working the final seam.
Next, sew a horizontal seam to close the bottom of the cushion cover. This is often referred to as mattress stitch or horizontal mattress stitch. There are some great instructions for this here at Knitting Daily. Feel free to use the stitch markers to help you line up the edges together.
Before sewing the final seam, remember to first stuff the pillow with the foam insert! (As pictured in the photo just above). Otherwise you’ll have a closed up cushion cover with no opening to put the pillow foam into. Then, work the final horizontal seam to finish it all up.

This is what your finished Uptown Worsted cushion will look like! Enjoy this new knitted accessory for your home.
And, that’s it! The finishing is a bit fiddly but certainly takes less time than knitting the front and back pieces of the cushion. And, the knitting skills you do in a project like this are very similar to the same skills you need for larger projects like sweaters – sewing pieces together, following stitch patterns, and more.
This week we’ve shown all the steps and materials you’ll need for this cushion cover knitted in Uptown Worsted yarn. We hope you’ll give it a try, or perhaps search for some other pillow cover projects that you might be keen to try. 100% acrylic yarn is sturdy and easy to care for, so it makes a great choice for home accessory projects.
