
Bella Chenille Big Glimmer is an addition to the Bella Chenille Big line of yarns by Universal Yarn. In my first post, I described the yarn and the pretty colors available. In the last post, I talked about knitting needles and how Bella Chenille Big Glimmer responds to three sizes – the two recommended on the ball band 13 [9mm] and 15 [10mm], and the next larger size, 17 [12mm].
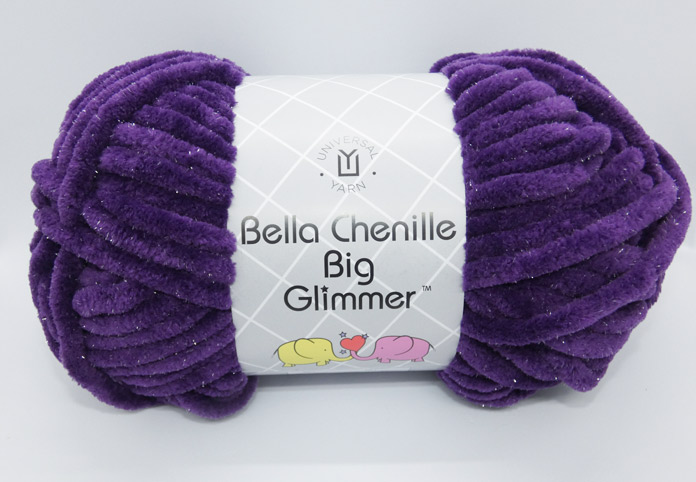
PURPLE! You can see white flecks in this photo where the camera picks up the glimmer in its own way.
One of the biggest challenges with chenille yarns (any chenille yarn, not just this big one), is how to handle weaving in ends, both at the cast on and cast off and when joining in a new yarn. Below are four ways of doing it. You can decide which you like the best. Method 1 works for weaving in ends at the cast on and cast off. Methods 2 and 3 work for both weaving in ends and joining in a new yarn, and method 4 makes a continuous strand of yarn, so it is good for joining yarn.
Method 1 – Weaving in as you would other yarns
Thread a large tapestry needle (size 16 is probably the smallest you can pull off, but I’ve found a size 13 works best – you could even use a bodkin) with a full strand of yarn. Leave a good length of yarn tail – this bulky yarn uses up more yarn than you think! Weave in the ends as you would with any other yarn. The chenille strands will mesh together somewhat, but this will still leave a fairly bulky, noticeable result.
Because a single strand of Bella Chenille Big Glimmer is so big, in this picture it’s easy to see where I’ve woven the yarn end on the back of the gray garter stitch sample.
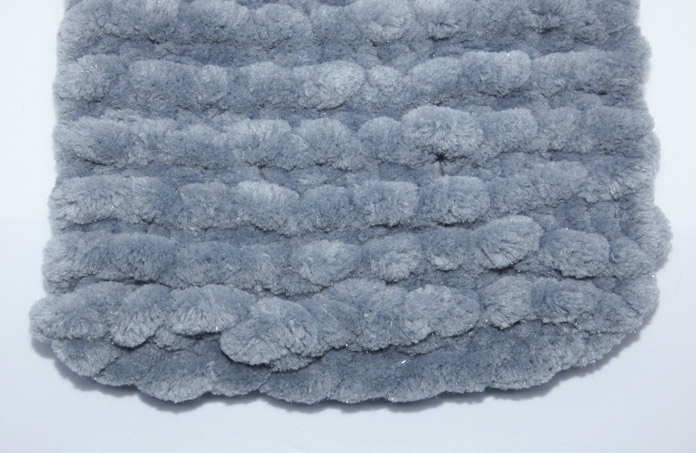
The yarn tail woven in on the bottom left corner adds thickness
Method 2 – Sew in with a matching sewing thread
I like this method. Thread a sewing needle with a strand of sewing thread in the same color as the Bella Chenille Big Glimmer. Fold the thread through the eye and knot the ends together. Lay the strand of yarn across the back of the work. Put the needle through the work and bring it back to the front, being sure to catch a strand of yarn. Loop the needle through the two strands of thread (at the knot) to anchor it. Taking care to catch both the yarn tail and a loop of yarn in the knitted fabric, sew the yarn end down along the back of the fabric. Draw the sewing thread snugly so it’s hidden between the fuzzy chenille strands. Sew down for a minimum of 2” [5cm], then, for added assurance, turn the yarn end back and stitch it down for a ½” to 1” [1-2cm] in the opposite direction (you can do this on a different row of the knitting). Anchor the end of the sewing thread, and clip both the thread and the excess yarn.

Look closely at the top left corner to see where I folded the yarn end back on itself when I sewed it down.
Method 3 – Sew in the core thread
Most chenille yarns have a core thread (often white) that binds the fluffy chenille threads together during the spinning process. Bella Chenille Big Glimmer is no exception.
![Two strands of purple chenille yarn are laid out on a pale gray knitted background. The purple fibers are pulled out for about 2” [5cm] on both of the strands to show the white core threads (2 in each strand). The core threads are separated out to prepare for joining in Method 4; Bella Chenille Big Glimmer](https://knitmuch.com/wp-content/uploads/image004-mg-22.jpg)
The fuzzy strands of purple are pulled back to show the white core threads, which I’ve already laid out to begin Method 4.
For this method, choose a thin tapestry needle (size 20 or maybe 22 will work) and trim the yarn end to 4-6” [10-15cm]. Pull out the chenille fibers until there is about ½” [1cm] of fibers remaining at the base of the yarn tail. Thread the tapestry needle with the two white core threads. Weave the core threads around the back of the stitches in the knitted fabric. As with the sewing thread method, pull the core threads snugly so they hide in between the chenille fibers. Secure the ends well and trim away the excess.

A less noticeable and less bulky way of weaving in yarn ends is to strip the chenille fibers back and weave in the core threads.
Method 4 – Tie the core threads together
I discovered this method when I found a knot in the yarn. Pull out the chenille fibers on both the old and new strands of yarn for about 2” to 2½” [5-6cm] – just enough to knot the core threads together (see second photo above). Take one core thread from each ball, and double knot them, bringing the chenille fibers from both strands together. Repeat with the other core thread from each ball. I use square (aka reef) knots.

The strands from the first knot show at the top of the purple strand and the strands from the second knot are below it.
Now, take one strand from the first knot and one from the second knot and tie them together tightly, then do the same with the other strands. Trim the core threads close enough so they can’t be seen above the chenille pile.

If you look very closely, you’ll see a small white dot (that isn’t part of the glimmer) where I’ve cut the core threads away.
Another knotted join can be found in this post, where Michelle Nussey reviews Bella Chenille Big Glimmer’s sister yarn, Bella Chenille Big. Michelle employed a method known as the Weaver’s knot. I was raised to complete my needlework without knots, but there are no knitting police, so just because I’m stuck on that philosophy doesn’t mean you have to be!
Come back for my next post when I’ll talk about the need for ease when working with big yarns like Bella Chenille Big Glimmer.