I happen to love the stripes created by long color repeats, but I also like to mix things up a bit and create some visual interest for the wearer’s, and the viewer’s, eyes when I knit something striped. Monday and yesterday, we looked at some of the great characteristics of Universal Yarn Colorburst and some amazing designs that really take advantage of the self-striping colors of this yarn.
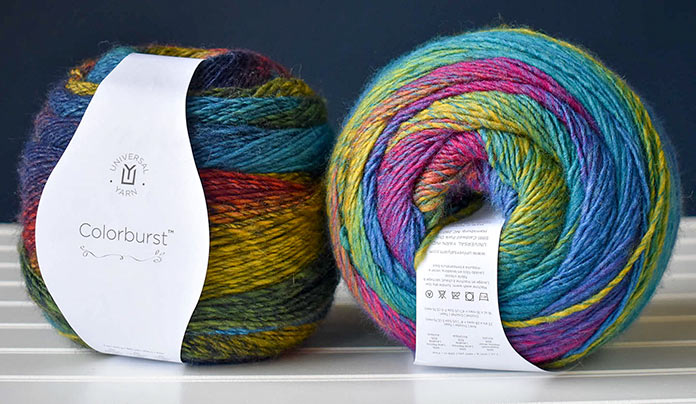
Universal Yarn Colorburst
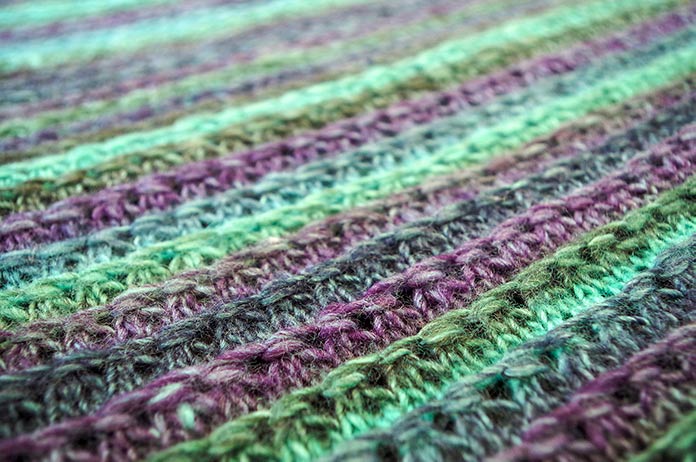
This is just a sneak peek of the shawl pattern that I’ll share on Friday.
As I swatched for the Northern Lights Shawl (just a peek today, pattern in full in Friday’s post), I tried all sorts of different textures. I knew I wouldn’t use them all, but I just had to see what worked. Today I’ll show you how to work four of these, but the one I ultimately chose will appear in tomorrow’s post.
Other than cables and knit/purl textures, I wanted to use something more disruptive, something that crosses row boundaries, or the normal ‘rules’ for needle tip insertion, so I experimented with mid-row bind-offs, wrapped stitches, tuck stitches and loop stitches. This is what happened…
Abbreviations
RH – right-hand
LH – left-hand
K – knit
P – purl
K2tog – Knit 2 sts together inserting the hook into the front loop of the 2nd st on the LH needle then immediately through the front loop of the first st.
Ssk – slip the next 2 sts knitwise, return to the LH needle, knit the 2 stitches together through the back loops.
Yo – yarn over
Sl – slip (purlwise unless otherwise stated)
Wyif – with yarn in front
The flat bobbles: Versions 1 and 2
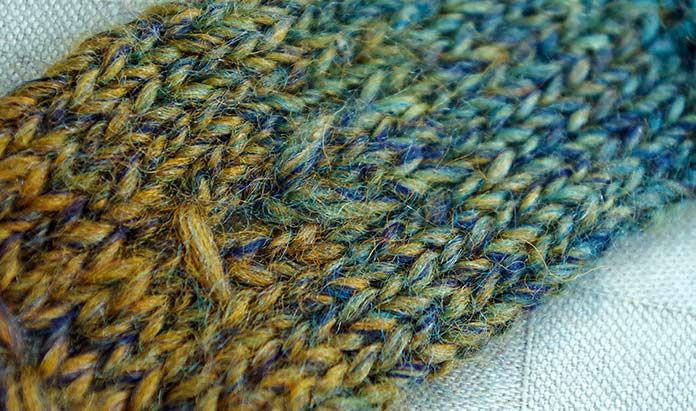
I call this a flat bobble. The texture is raised from the rest of the neighboring fabric, but it isn’t as tedious as a bobble to make, nor is it as puffy.
Worked over 3 stitches in the middle of a row.
Row 1: Work to chosen 3 sts, insert RH needle between 3rd and 4th sts on LH needle and knit up a loop. Draw the loop over across the 3 sts, k2tog, yo, k1, pass long loop over first 3 sts on RH needle, continue across row.
Row 2: Work to chosen 3 sts, p3, continue across row.
Row 3: Work to chosen 3 sts, k1, knit below into eyelet, k1, continue across row.
Row 4: Work to chosen 3 sts, p3, continue across row.
Row 5: Work to chosen 3 sts, insert RH needle into eyelet and knit up a loop, draw the loop up to the height of the current row, k3, pass loop over 3 sts just knit, continue across row.
Row 6: Work to chosen 3 sts, insert RH needle into eyelet purlwise and purl up a loop, draw the loop up to the height of the current row, p3, pass loop over 3 sts just purled, continue across row.
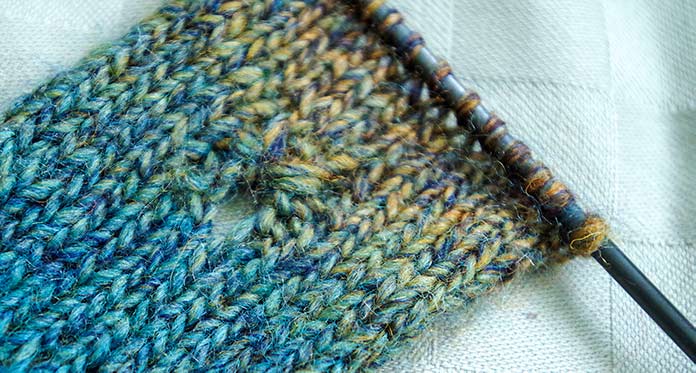
This flat bobble originates from a yarn-over eyelet and sits subtly on top.
Version 2
Worked over 3 stitches in the middle of a row.
Row 1: Work to chosen 3 sts, k1, yo, ssk, continue across row.
Row 2: Work to chosen 3 sts, k3, continue across row.
Row 3: Work to chosen 3 sts, k3, continue across row.
Row 4: Work to chosen 3 sts, k3, continue across row.
Row 5: Work to chosen 3 sts, knit into eyelet drawing loop to height of current row, k3, turn work, purl into eyelet drawing loop to height of current row, turn work, sl 1, continue across row. (2 sts increased)
Row 6: Work to chosen 5 sts, sl 1, pass 4th stitch on LH over first 3, p3, pass 4th st on RH needle over first 3, continue across row. (2 sts decreased)

A couple extra wraps around the needle and a few delayed stitches yields this subtle butterfly motif.
Butterfly Motif
Worked over 7 stitches in the middle of a row.
Row 1: Work to chosen 7 sts, insert RH needle in next st, wrap yarn 3 times and knit up the 3 loops together, k2, knit next st with a double wrap, k2, knit next st with a triple wrap, continue across row.
Row 2: Work to chosen 7 sts, wyif, sl next st allowing extra wraps to drop, k2, wyif sl next st allowing extra wrap to drop, k2, wyif sl next st allowing extra wraps to drop, continue across row.
Row 3: Work to chosen 7 sts, drop first st from LH needle without allowing it to unravel, k1, return dropped st to RH needle, k1, sl1, k1, sl 1, drop next st from LH needle without allowing it to unravel, return slipped st to LH needle, return dropped st to RH needle, k1, continue across row.
Row 4: Work to chosen 7 sts, p1, wyif, sl1, k1, wyif sl1, k1, wyif, sl1, p1, continue across row.
Row 5: Work to chosen 7 sts, k1, sl2, pass 2nd st on LH needle over first, sl1, pass 2nd st on RH needle over first, return 2 sts to LH needle, slip next 2 sts together through front loops as if to knit 2 together, (k1, yo, k1, yo, k1) into next st, pass 2 slipped sts (6th and 7th on RH needle) over 5 sts just made, k1, continue across row.
Row 6: Work to chosen 7 sts, p7, continue across row.
Trillium Motif
Worked over 6 stitches in the middle of a row.
Row 1: Work to chosen 6 sts, k3, yo, k3, continue across row (one st increase in middle of motif – 7 sts)
Row 2: Work to chosen 7 sts, p7, continue across row.
Row 3: Work to chosen 7 sts, k7, continue across row.
Row 4: Work to chosen 7 sts, p3, sl1, p3, continue across row.
Row 5: Work to chosen 7 sts, K3, knit into eyelette 4 rows below drawing loop up to current row height, drop next st, k3, continue across row.
Row 6: Work to chosen 7 sts, p3, purl into eyelette wrapping yarn twice and drawing up to current row height, p1tbl, p2, turn work, knit into eyelette wrapping yarn twice and drawing up to current row height, turn work, sl 1, p1, continue across row. (2 sts increased)
Row 7: Work to chosen 9 sts, k2tog, k3, drop next st without allowing it to unravel, k1, place dropped st on RH needle, sl 2, pass 2nd st on RH needle over first, return 2 sts to LH needle, knit tog through back loops, continue across row.
Row 8: Work to chosen 6 sts, p6, continue across.
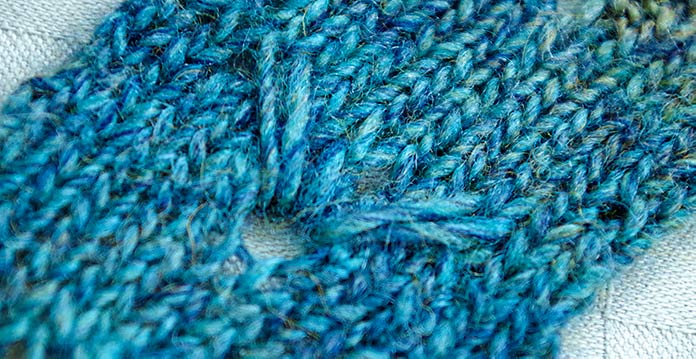
Just like the 3-petal flower, this motif with 3 extended stitches looks like a Trillium flower.
I hope you give these stripe-disrupting stitch motifs a try. You could even work them evenly spaced across the width of the knitting and stagger them on a section of rows further along in the work. These knitting stitch patterns look fabulous using Universal Yarn Colorburst but would also work up great using a solid yarn. Please let me know which ones you try. Tomorrow I’ll explain how to work the stitch that looks like a linked chain ridge.
