
There’s a lot of variety in knitting world, but one of the things all knitting projects have in common is that your first step is always to cast on the stitches. So, knowing a few different cast on techniques is very useful! Last month we looked at the cable cast on, which is similar to the knitted cast on. The longtail cast on is another popular cast on technique, but can sometimes be a challenge to learn especially for young knitters with small hands. In this post we’re going to demonstrate knitting an alternative longtail cast on with two hands, that is a personal favorite cast on technique of mine.

The longtail cast-on is one of the most versatile!
The longtail cast on is one of the most versatile cast on techniques. It produces an edge that is sturdy but slightly elastic, and that makes it useful for many different edges. It’s as useful for casting on a hat as it is for a sweater or blanket.
To do this cast on with two hands, work as follows (all photographed below):
Step 1: Make a slip knot on the needle, leaving a very long tail of yarn on one side and the working yarn on the other. (How long of a tail to leave? Estimate three times the length of the length of what the cast-on edge will be).
Step 2: With the long tail on the left hand side of the knitting needle, make a loop around your thumb.
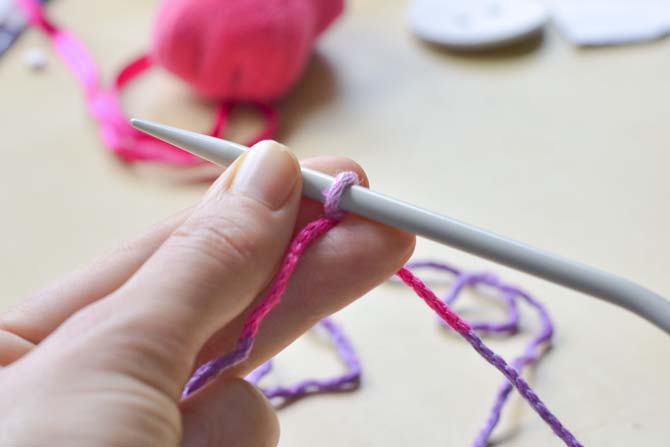
Step 1: Start with a slip knot.
Step 2: With the long tail, make a loop around your thumb.
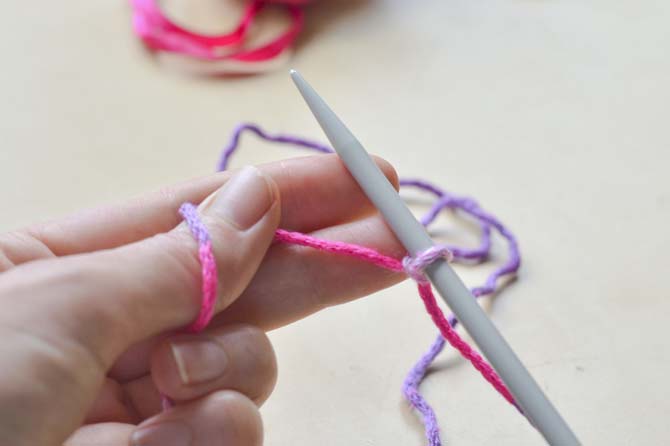
Step 3: Slip the loop around the tip of the needle, and wrap the working yarn around the needle from the right hand side.
Step 4: With the left hand, slip the yarn loop over the tip of the needle while leaving the wrapped yarn in place.
Step 5: Gently pull the yarn on each side to ensure the stitch sits snugly and evenly on the needle. (This step especially will start to become a practiced habit).

Step 3: Slip the loop around the needle, and wrap the yarn around the needle from the other direction.

Step 4: Slip the loop over the tip of the needle, while leaving the wrapped yarn on the needle.
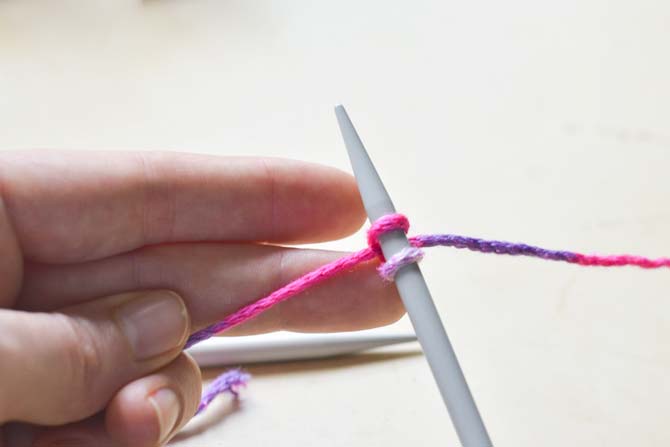
Step 5: pull the stitch snug (but not too snug) and even by tightening from each side.
Simply repeat these steps as many times as you need to, to get the required number of stitches. Once this feels comfortable, you should be able to move on to the traditional method if you like! The traditional longtail cast on uses one hand to hold both the tail and the working yarn in the ‘slingshot’ hand position, that is also used in other cast on techniques.
No matter which method you use for the longtail cast on, a common challenge is figuring out how long of a tail to use! If you run out of yarn on the tail side before casting on enough stitches, it can be very frustrating. In tomorrow’s post we’ll look at a solution to this problem! But, if you’ve found longtail cast on challenging in the past, try the alternative longtail cast on with two hands and see how it goes.
1 comment
Thank you, thank you. I had watched many videos on how to do a long-tail cast-on and my fingers just couldn’t get the rhythm (I have some arthritis in my hands). Your description and pictures were easy to follow and my fingers could do it. I am very happy!