This week I’m having fun dyeing yarn with Rit All Purpose Dyes and Ready to Dye Yarn from UNIVERSAL YARN.
Yesterday I described three different wool-based yarns and two different versions of dye. Today, I’ll address the different equipment and tools needed for each of the three methods I’ll use to dye the yarn.

Dedicated equipment and tools for dyeing
It’s important to note that you must have separate equipment from your regular kitchen utensils. Everything I use is dedicated to dyeing. You might say that I have a dyeing stash that is comprised of equipment, tools, and yes, even yarn.
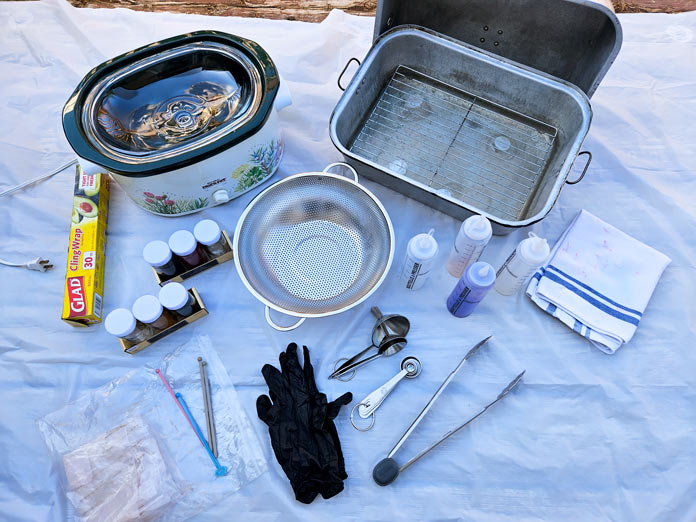
It might seem expensive to have all of this equipment, but there are very economical ways of obtaining what you need. Between thrift stores, dollar stores, yard sales and old used stuff, I managed to get everything you see.
For cooking the dye, I use:
- old roasting pan – friend’s destash
- cooling rack that fits inside the roasting pan – retired from the kitchen
- slow cooker – thrift store
- stock pot – from the Guild studio
- colander for steaming over a stock pot – dollar store
For measuring and pouring, I use:
- metal measuring spoons and funnels – dollar store
- measuring cup – retired from my kitchen
- condiment squirt bottles for holding and applying the liquid dye – dollar store
- spice jars to hold the dye powder – dollar store
- swizzle sticks for stirring – long-forgotten barware
For safety purposes, I use:
- latex gloves – Covid stash
- mask for mixing powder dye – Covid stash
- drop sheet or shower curtain liner – dollar store
- old rags or towels for wiping up – retired from home use
Other items to have on hand include:
- thermometer to check the temperature of the cooking water – from the toolbox
- foam brushes for painting – optional
- plastic zipper locking bags and plastic wrap
- vinegar – must-have for setting the dye on protein-based fibers
- salt – must-have for setting the dye on cellulose-based fibers
- bucket, tub, or separate sink for soaking the yarn
Where to do your dyeing is also important as you shouldn’t dye where food is prepared. I have access to the dye kitchen of my Guild, but not everyone has that luxury. In the summer months, I use the side burner on my barbeque for the stock pot or roasting pan. The slow cooker(s) – I have several – can be plugged into an outdoor outlet. If working outside is not an option, just make sure that the dyeing and food preparation areas are completely segregated. The laundry room is also an option, especially for mixing dyes and rinsing the yarn.

The yarn, the dye and the equipment are all at the ready to begin dyeing with Rit All Purpose Dye and UNIVERSAL YARN Ready to Dye wool skeins.
I have everything I need to get started – the yarn, the dyes, and the equipment. Tomorrow I’ll begin dyeing using the Snow Dye method. I hope you join me as I use the Rit All Purpose Dye powders to color one of the skeins from the UNIVERSAL YARN Ready to Dye Yarn collection. This will be fun!
