Oh, darn. It’s the end of our week with Fibra Natura’s Flax Lace yarn. I’ve had SUCH a good time, I’m sorry to see it come to an end.
Flax Lace is a lovely linen yarn, perfect for beautiful summer shawls and stoles. We’ve expanded on this use by giving a second life to our gauge swatch. Now, it’s a lovely, lacy handkerchief that gives our bride “something blue” to tuck into a drawstring bag or the pocket of her dress. It could even be pinned right into the bouquet!

Once blocked, our tension swatch blossomed into a beautiful lace handkerchief!
Eventually, there will be a co-ordinating shawl for the bride to wear (it, too, will be blue), but I need a little more time to develop that thought.
Today, we’re accessorizing our wedding with a bonus ring bearer pillow top (see Bonus Pattern, below), and a white stole that could be worn by the mother-of-the-bride (or -groom), or the bride’s attendants. Wouldn’t a hand-knit stole make a lovely bridesmaid gift?
We chose white for our Flax Lace stole, because it’s neutral. It would make a soft statement with pastel pink or gray gowns, or a marvelous contrast with navy, black, or fuchsia dresses!
Let me share a few tips for working with a pure white yarn. Common sense says we’ve GOT to ‘keep it clean’. That means washing hands before beginning a knitting session, and, if the knitting session will be a long one, during it! On average, people touch their faces 3.6 times per hour, and they touch other objects 3.3 times per hour (more often when you’re watching TV and zipping through the ads). That’s a minimum 6.9 chances per hour to transfer makeup or skin oils from you or the remote onto your knitting! (I know! Eeeooo!)

Left, two foam “cushions” from apples. Right, the “cushions” repurposed into “yarn bras” to keep our Flax Lace yarn from tangling.
Protect the outside of the yarn putting it in a yarn bra, and protect it more by putting the yarn into its own bag. (This also minimizes tangling.) Don’t snack while knitting – a spilled cup of tea or a dropped chocolate bar could be disastrous! (And, did I mention contamination from touching other objects?) Of course, the work-in-progress also needs to be kept clean. I keep it in its own bag, too. As it grows, I may even use a pillowcase. And, naturally, you want to keep this project out the reach of tiny, sticky fingers and a shedding black cat!

Calico bags in assorted sizes protect white yarn (any color, really) from accumulating dust and skin oils.
The horseshoe lace pattern is a versatile one. With only 4 rows of patterned knitting (each alternating with a purl row), it’s a fairly easy pattern. Its construction, with columns of double decreases enables the knitter to see where they are in the work, too.
Let’s begin, shall we?
Horseshoe Wedding Stole
In Great Britain, and some areas of North America, a horseshoe is considered a symbol of good luck. An ornately decorated, fabric horseshoe is often given to a bride to carry down the aisle at her wedding.
This symbol inspired me to create the Horseshoe Wedding Stole. It has double the luck, because I’ve incorporated “rice” in the form of seed stitch. Rice is a symbol of good luck and prosperity.
Skill level is intermediate, but an adventurous beginner needn’t be shy!
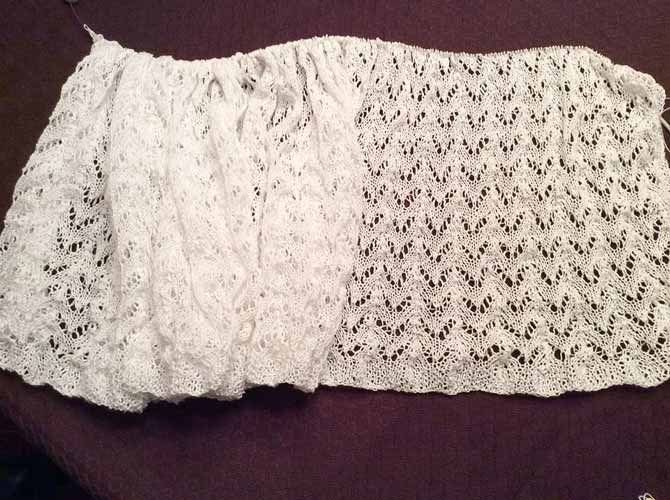
The Horseshoe Wedding Stole at the 13″ mark. If you knit to tension, and follow this pattern, the finished piece will measure about 18″ – 19″ from the cast on, before blocking.
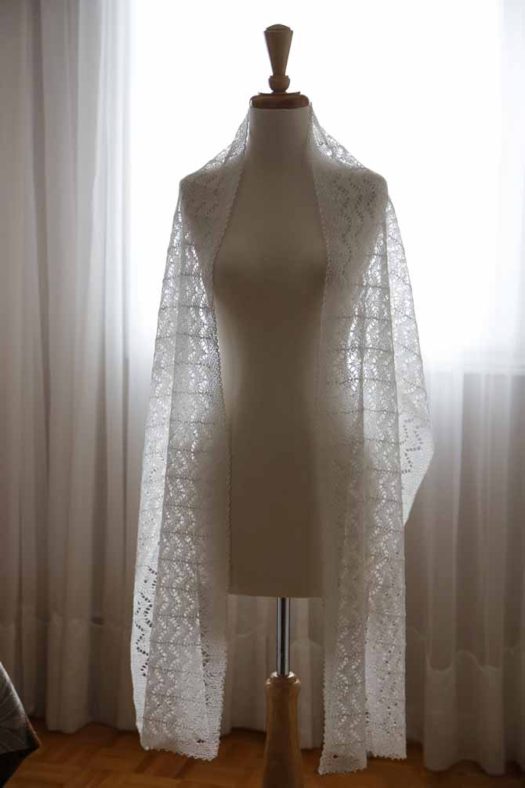
The Wedding Stole knit up with Universal Yarns Flax Lace in white, the yarn gives it an airy feeling.
finished measurements
before blocking: 16″ [40cm] x 71″ [180cm]
after blocking: 16¼” [41cm] x 82″ [211cm]
materials
2 skeins Universal Yarns Flax Lace, 547yds per 100g
US4 (3.5mm) circular needle or size needed to obtain gauge
stitch markers (optional)
row counter (optional, but recommended)
bead (optional)
gauge
26.5 sts and 35 rows to 4″ [10cm] before blocking/ 25 sts and 35 rows to 4″ [10cm] after blocking (swatch was 22 sts and 40 rows)
30 sts (3 repeats) to 4½” [11.7cm] before blocking and 5¼” [13cm] after blocking
40 rows (5 repeats) to 4½” [11.5cm] before blocking and 5¼” [13cm] after blocking
Take time to sample and get gauge!
abbreviation
sk2p – slip 1 st to right needle, knit next 2 sts together, pass slipped stitch over
Note: The shawl is knit from the top/ neck edge to the bottom edge (this makes the “horseshoes” in the lace sit so that the luck stays in the shoe!) A crystal, or contrasting bead can be inserted in the center stitch of the top border to make it easy for the wearer to identify the top edge.
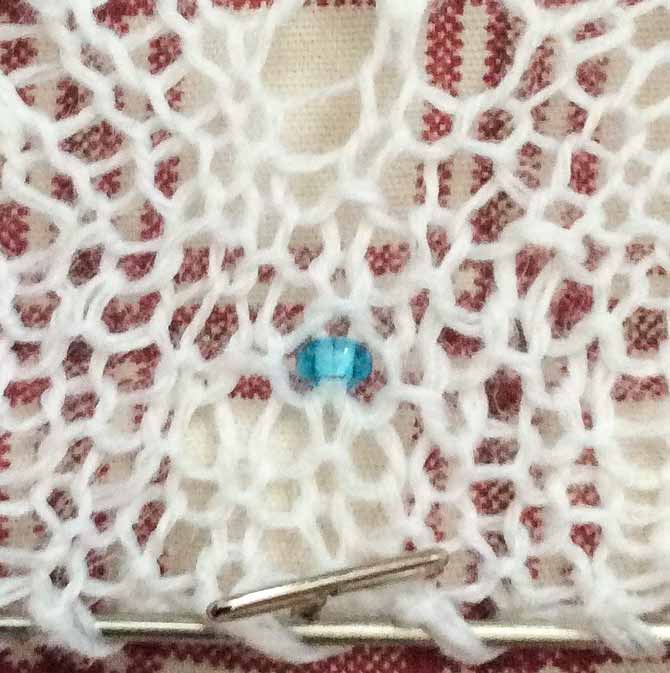
The addition of this pale blue glass bead gives a bride her “something blue”, and it serves as a cue for the wearer to know top from bottom.
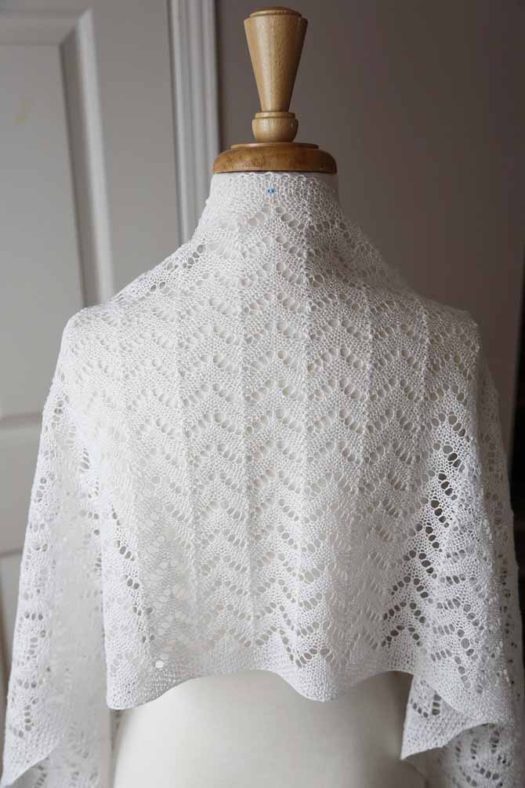
The Wedding Stole elegantly made using Universal Yarns Flax Lace
Instructions
Beginning at the neck edge, cast on 473 sts
Rows 1-9: *k1, p1; rep from * to last st, k1. If desired, place a stitch marker between the 6th and 7th sts on rows 8 and 9 to serve as a reminder to work the border sts.
Row 10(and all WS rows): (k1, p1) 3 times, p to last 5 sts, (k1, p1) twice, k1.
Row 11: (k1, p1) 3 times, k1, *yo, k3, sk2p, k3, yo k1; rep from * to last 6 sts, (p1, k1) 3 times.
Row 13: (k1, p1) 3 times, k1, *k1, yo, k2, sk2p, k2, yo, k2; rep from * to last 6 sts, (p1, k1) 3 times.
Row 15: (k1, p1) 3 times, k1, *k2, yo, k1, sk2p, k1, yo, k3; rep from * to last 6 sts, (p1, k1) 3 times.
Row 17: (k1, p1) 3 times, k1, *k3, yo, sk2p, yo, k4; rep from * to last 6 sts, (p1, k1) 3 times.
Repeat rows 10 – 17 until work measures 17″ [43cm] from cast on edge, ending with a Row 10.
Repeat rows 1-9. Cast off in pattern.
Weave in any ends, and block hard.
Want to work from a chart?
Cast on 473 sts.
Work rows 1 and 2 4 times.
Work row 3.
Work rows 4-11, repeating the sts between the dark black lines 46 times.
Repeat rows 4-11 until work measure 17″ [43cm] from cast on. End with row 11.
Work rows 12 and 13.
Work rows 14 and 15 4 times. Cast off all sts.
Weave in any ends and block hard.
Post Script I had about 8 grams (less than 50 yards) left at the end of my sample stole. That’s a little close for comfort. If I’d had a third skein, I would have added at least 3 more row repeats (24 rows), to bring the width of the stole closer to or just over 20″.
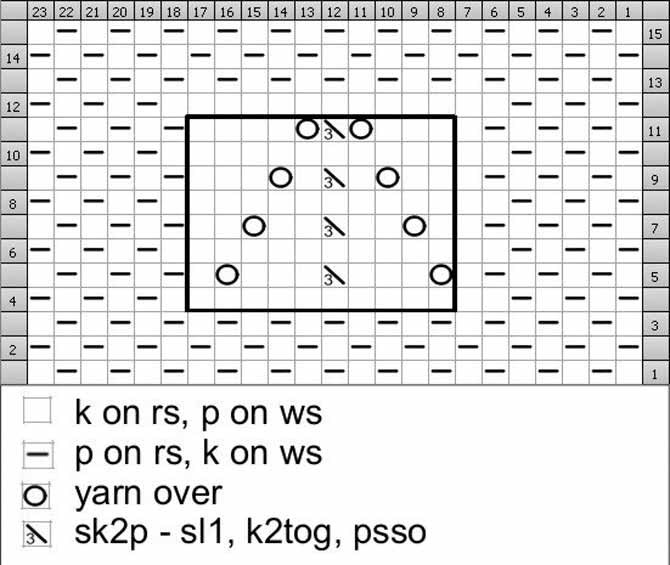
Charts can convey a LOT of information in a small space. 23 sts and 15 rows give all the information for a stole that has over 470 sts!
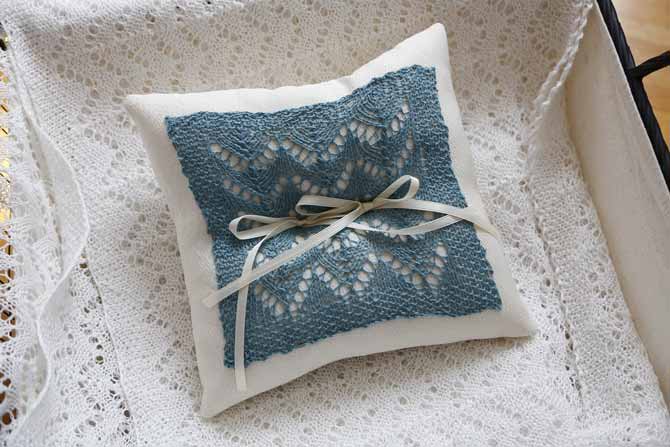
I added two pieces of ribbon to this ring pillow for a “his ‘n hers” ring ceremony, I also used the background fabric to make a handle on the underside.
Bonus pattern – Ring Bearer’s Pillow
Only charted instructions for this one. Go on – learn to read a chart! It’s only a little project!
Cast on 43 sts.
Using the chart above, work rows 1 and 2 3 times.
Work row 3.
Work rows 4 -11, repeating the sts between the dark black lines 3 times (in total).
As work progresses, measure the bottom border and the width of the square. When the knitting measures approximately the width of the square minus the height of the bottom border (about 6″ [15cm]), finish the current repeat at Row 11.
Work rows 12 and 13.
Work rows 14 and 15 3 times. Cast off all sts.
Weave in any ends and block.
Make a white pillow 3″ larger than the after blocking measurements (finished size — add seam allowances!) Stuff the pillow and stitch the lace piece onto the top with matching sewing thread, centering it to the top (or you could turn it diagonally.) Sewing through all layers, attach a length of white ribbon with matching sewing thread.
I hear wedding bells, do you?
This is part 5 of 5 in this series.
Go back to part 4: The math behind customizing a knitted lace stole

1 comment
Stoles will never go out of trend i guess. Nice post it was. Got many ideas to implement. Thanks.