
Yesterday I wrote about how well this week’s yarn Fibra Natura’s Cotton True Sport, a lovely, soft, Pima cotton yarn stands up to laundering. The swatch of the ripple stitch pattern below is an example of how it comes out unscathed. For the next few posts, we’ll look at ripple stitch patterns and how to work increases, decreases, and even design your own. Then we’ll look at what happens when a ripple stitch goes a travelin’ (more later).
One aspect of ripple stitch patterns is that to achieve stark contrasts in valleys and peaks, it’s necessary to make sudden increases in the zones that become the peaks. There are several ways to make these increases and each have characteristics which different knitters prefer, based on ease to work and appearance.

Cotton True Sport, in a knitted lace in ripple pattern
The first thing to consider when working a multiple increase into an eyelet that is formed with a yarn-over on the previous row or round is how large the eyelet should be. If you want a small, tight eyelet, or one that’s close in size to a standard eyelet that has no increases worked into the yarn over, you’ll want to continue to use a single yarn over. However, if you’re looking for a lacier look, you may want to consider wrapping the needle twice or 3 times when you form the yarn over. This makes a bigger eyelet on the following row when the multiple increases are worked into the yarn over.
This swatch was knit on 3.00mm needles. Cotton True has excellent stitch definition and on these smaller needles, it’s possible to keep the lace eyelets neat and consistent in size. I found when I swatched with larger needles my lace became a little unruly and wouldn’t hold the blocking. So, your tension and your materials choices are other matters to keep in mind when working multiple increases in your knitting.
Even number of increases
Working an even number of increases actually involves knitting 3, 5, 7, etc loops into one stitch. Confused? Well, if I knit 3 loops into one stitch, one of these loops counts as the stitch itself and the other 2 loops count as the 2 increases — an even number of increases. The neatest and most common way to work an even number of increases looks like this: (k1, yo, k1) all into the same yarn over stitch from the previous row. This adds 2 stitches to the row stitch count. It’s also possible to work (k1, yo, k1, yo, k1) or even (k1, yo, k1, yo, k1, yo, k1) into one eyelet. These give an increase of 4 or 6 sts, respectively. The more stitches you work into one eyelet, the more rows it takes for these stitches to even out, become less bulky and lie flat. Experimenting with the different options is a good way to see what you like best.
Odd number of increases
If you want to increase by 1 stitch it’s simply a matter of working 2 loops into one stitch. The first loop counts as the same stitch being worked into, and the second loop counts as the one increase. There are several ways to work 2 stitches into an eyelet yarn over.
Purl bump in a multiple increase
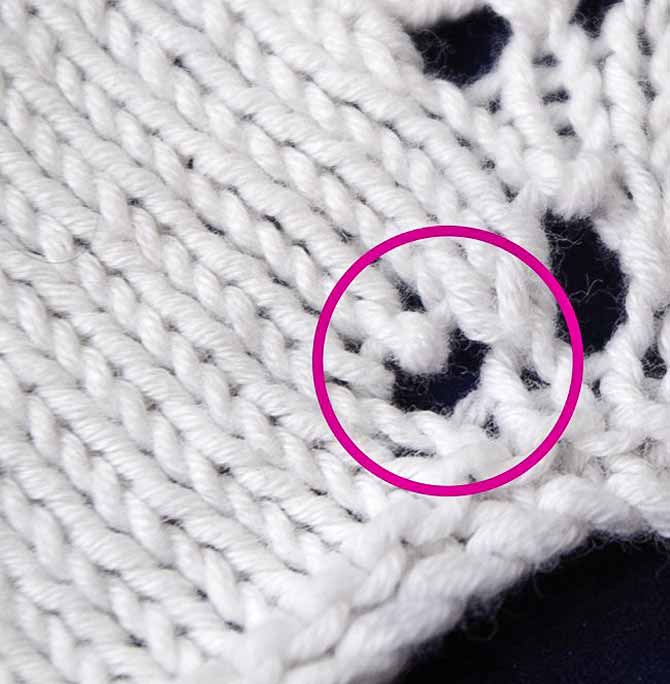
The most common way to work two stitches into one is to (k1, p1) into the same stitch. This has been the most common increase since times eternal. Well, maybe I exaggerate.
As you can see in the highlighted area of this swatch, the purl stitch creates a little picot bump that juts out into the eyelet. If this is done consistently, it can be quite delicate and cute. But not everyone likes the little picot bumps. So there’s an alternative, well actually several.
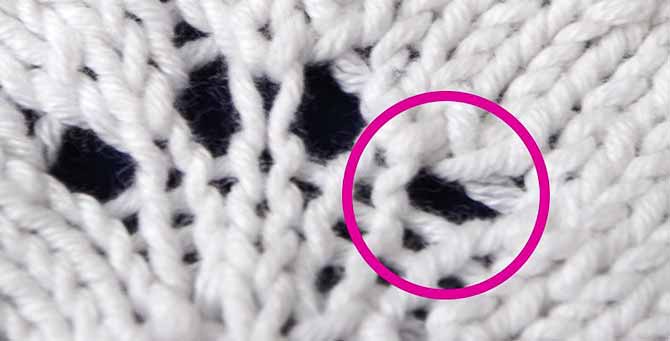
Twisted stitch in multiple increase
To achieve the look in the highlighted area above, I worked (k into front loop, then k into back loop) of the eyelet yarn-over. This does get rid of the bump in the eyelet, but if you look closely at the top of the circled area, there is a diagonal strand that crosses over the second stitch and this does appear a bit like a bump, at least a raised strand.
So there are 2 other possibilities.
1. When you make the yarn-over on the previous row, make a double wrap. Then when you’re working into the double wrap on a purl side you purl into the first strand of the double wrap and then you slip stitch knitwise into the second strand. If you’re working in the round, you knit into the first wrap and slip stitch purlwise into the second strand. This technique gets rid of all bumps and leaves a lovely compact eyelet.
2. The other option is to work a purl or knit into the yarn over, to yarn over again (the 2nd increase) and to continue across. This actually creates 2 eyelets that are stacked on a slight angle to each other.
Please try out these different multiple increases. When we look more in depth at some ripple stitch patterns, you’ll have a chance to try them out in a pattern.