Pom poms make darling decorations on their own, and the perfect finish for winter hats and mittens. You just need these tools and your favorite scrap yarn!
Pom-poms are one of the final flourishes that can take your finished knitting to the “next level.” They’re often used as an accessory on top of a knitted hat, or at the edge of a mitten cuff. You might even have seen them attached to the corners of baby blankets, or the ends of scarves. These little darlings are very versatile!
There are a lot of “low tech” ways to make them, but if you want that almost magazine-looking quality, try using a pom-pom maker (pictured above). They will give your pom-poms a symmetrical, polished quality that’s hard to beat, and also come in different sizes for different pom-pom needs. In the photos below, I’m going to show you how it works! The results are hard to beat.

Step 1: Hold the pair of rings together, smooth sides out. Begin wrapping your yarn around the rings.
First, gather your materials. You’ll need a bit of scrap yarn (any weight will do – I’m using worsted-weight wool to demonstrate these), your pom-pom maker in the size you prefer, and a dull tapestry needle/wool needle for the smaller sized pompoms if that’s the size you’re making. The pom-pom makers I’m using in this demonstration come in 3 sizes that all snap together. This means you can use one size at a time, or combine 2 or 3 sizes together to adjust the size if you wish.
All ready? Let’s start our pom-poms!
Step 1 (pictured above): begin with the 2 pom-pom rings facing together with their ‘flat’ side out. start wrapping your yarn around both of the rings together, and keep wrapping all the way around.
Step 2 (pictured below): keep wrapping the yarn until it’s as thick as you want it to be. The more you wrap, the more solid your pom-pom will be. I recommend wrapping it at least twice around all the way, but keep wrapping more if you want a really sturdy pom-pom!

Step 2: Continue wrapping the yarn until it is at least twice covered by the yarn, or as much as you want to keep wrapping!

If you’re using the smaller pom-pom makers, it’s easier to use a tapestry needle to thread the yarn through the smaller hole in the center.
Step 3 (pictured below): Once you’ve wrapped the yarn as much as you want to, hold the rings – which now resemble a “yarn doughnut!” – firmly in the center, and start cutting all around the outside edge of the rings.
The first time I tried this, I worried the yarn would simply fall out of the center of the ring and that it wouldn’t work at all. I was wrong! As long as you’ve created enough yarn wraps, the yarn will simply rest nestled up all the strands together in the center.

Step 3: Cut the wrapped yarn along the outside center edge of the ring, while holding firmly in the center.

Step 4: Slowly pull the rings apart so that the center of the yarn is exposed. Don’t remove the rings completely.
Step 4 (pictured above): Slowly pull the two rings apart, to expose the center of the little yarn bundle – but be careful not to completely remove them. This will look a bit like two jellyfish stuck together.
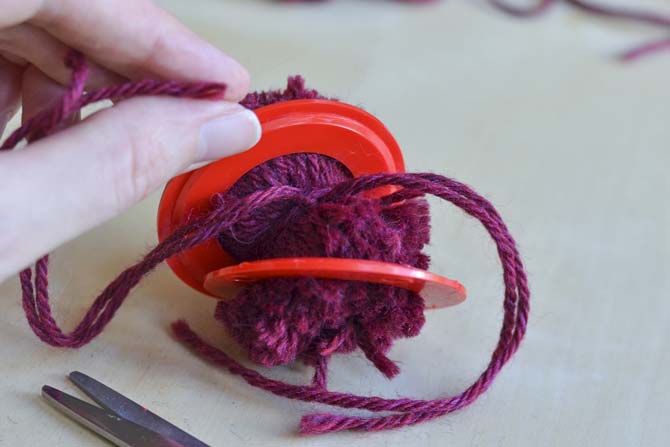
Step 5 (pictured below): With the center of the yarn bundle exposed, tie 1 or 2 longer strands of yarn around the whole works, and tie a knot firmly. Now it’s safe to remove the rings!

Step 5: Using 1 or 2 longer strands of yarn, tie them firmly around the pom-pom yarn bundle. Be snug!
Step 6 (pictured below): Once you’ve removed the rings, all that’s left to do is snip away any uneven ends and then give it a “floof” with your fingers, and you’re done! It’s a perfect little pom-pom, ready to adorn the top of your next winter hat.

Step 6: Snip away any uneven pieces of yarn, give it a “floof” with your fingers, and you’re done!
If you keep your pom-pom maker handy in your knitting tool-kit, you’ll be ready to finish your hat and mittens if they call for pom-poms right away. Or, you can make a few at a time when you come to the end of a project, as a way to use up small amounts of extra yarn. Pom-poms make great little decorations on their own, or strung together to make a garland! Pom-poms are gorgeous final flourishes to take your knitting to the next level.
