
Yesterday, I introduced you to my plan to convert the free knitting pattern called Ribline Pullover into a knitted cardigan for spring using Cotton Supreme Waves.
As promised, I’ll tell you how to modify the sleeves to make them short. But first, we need to talk about how to get to know your yarn. I know you’re cringing right now because I’ll talk about swatches. To get acquainted with the qualities of Cotton Supreme Waves, you do have to knit some swatches and I’ll tell you why.
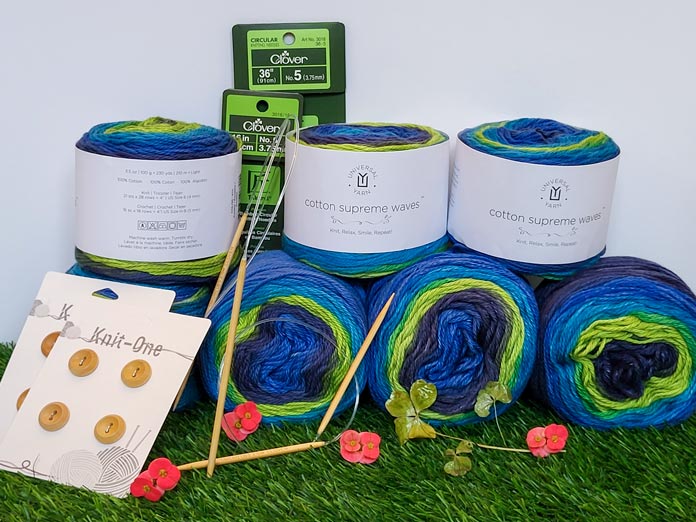
The materials required to produce the converted spring cardigan
The first reason I needed to knit some swatches was to choose the best needle for my style of knitting.
I know from experience that knitting with cotton feels different than knitting with wool. I find cotton is less forgiving and doesn’t snap back when forming the stitches. I tried needles constructed from different materials to determine which would give me the best combination of control, flow, and tension.

Swatches knit with different needle compositions to determine my favorite for Cotton Supreme Waves
I tried needles comprised of laminated wood, natural wood, nickel-plated brass, coated aluminum and premium bamboo. I needed a little more grip to get better control of the stitches so I chose the Takumi Premium Bamboo circular knitting needles by Clover.
My tension was a little bit loose for the DK gauge I needed with a size Takumi Premium Bamboo 4 mm, so I used a size 3.75mm to get the proper gauge.
The next reason to knit several swatches is to get to know the pattern stitch.
I made 3 large swatches in Slip Stitch Rib with the needles I hoped to use for the garment. The pattern Ribline Pullover lists the main stitch used as Slip Stitch Rib. To produce this stitch consistently it takes a bit of practice. It’s a good idea to build up some muscle memory before you dive into the garment if you want to achieve an even knitted fabric.

Swatches knit in Slip Stitch Rib pattern with Cotton Supreme Waves before test washing.
Another good reason to knit several large swatches is to test the wash-ability.
Cotton is a bit tricky when it comes to washing (and blocking). Typically I would hand wash and dry flat a knitted garment, but this yarn label states machine wash warm, tumble dry! Cotton garments in general tend to shrink in length (and sometimes get wider) in the washing machine and especially the dryer. This sweater pattern is worked sideways, so the stitch width will be the length of the garment. I had better be aware of any changes that need to be considered before I make my modifications to the pattern.

Swatches knit in Slip Stitch Rib pattern with Cotton Supreme Waves after test washing two.
So what are my findings? Well, good news! First, I hand-washed a swatch with Soak gentle laundry soap, squeezed it out and then let it dry flat on a towel. The wash water had no loose dye! So I can feel comfortable that the yarn is colorfast (and navy blue is a tricky one). Once dry, it did shrink in length a little bit and I took note; the width was unchanged. The second swatch was only steam-blocked and it remained the same size. Then the last swatch was machine washed on gentle, with a few tee shirts, using plant-based liquid detergent. Then it was tossed in the dryer with the same shirts on medium heat, until it was fully dry. It did shrink in length; the width was unchanged. On the plus side, it got softer and fluffy!
What I learned from test washing was super important! Not only did I get to know what to expect after laundering, but I found that my tension gauge now matched the listed gauge on the Ribline Pullover pattern. The machine-washed and dried swatch was on gauge!
And the last reason to knit several large swatches is to know your gauge!
My unwashed swatch has a gauge of 24 sts X 33 rows = 4” in Slip Stitch Rib. And my machine-washed and dried swatch has a gauge of 24 sts X 36 rows = 4” in Slip Stitch Rib. What this means to me is that I can go ahead and knit through the pattern as written, without making adjustments for gauge. And I know that 9 rows will equal 1” once finished, no matter what the tape measure says. Just put away the tape measure and trust the numbers.
Back to the sleeves and how to get started on the actual sweater
This sweater is knit sideways and divided into two pieces, right side and left side. It begins at the right sleeve. I decided to make my sleeves elbow length, approximately 6” – 7” long. I need to cast on and start my sleeves at the point in the pattern where they are 6” from completion at underarm. I did the math and won’t bore you with the calculations.

Beginning of sleeve knit in Slip Stitch Rib pattern with Cotton Supreme Waves
Instead of starting the pattern as written, follow my instructions below:
RIGHT SIDE
Sleeve
With 32-40” circ ndl, cast on 60 (64, 74, 78, 82, 88, 92, 98, 102) sts.
Row 1 (RS): K1, p0 (0, 1, 0, 0, 0, 1, 1, 0), k1 (0, 1, 1, 0, 0, 1, 1, 1), *p2, k1; rep from* to last 1 (3, 2, 1, 3, 3, 2, 2, 1) sts, p 0 (2, 1, 0, 2, 2, 1, 1, 0), k1.
Row 2 (WS): P1, k0 (2, 1, 0, 2, 2, 1, 1, 0), *sl1, k2; rep from * to last 2 (1, 3, 2, 1, 1, 3, 3, 2) sts, sl1 (0, 1, 1, 0, 0, 1, 1, 1), k0 (0, 1, 0, 0, 0, 1, 1, 0), p1.
Rep rows 1-2 twice more.
Shape Sleeve
Inc Row (RS): K1, m1R, cont as est’d to last st, m1L, k1 – 2 sts inc’d.
Maintaining Slip Stitch Rib as est’d, rep Inc Row every 0 (0, 0, 0, 0, 0, 6, 6, 0) rows, 0 (0, 0, 0, 0, 0, 4, 4, 0) more times, then rep Inc Row every 24 (16, 12, 10, 8, 8, 8, 8, 6) rows, 1 (2, 3, 4, 5, 5, 2, 2, 7) more times – 4 (6, 8, 10, 12, 12, 14, 14, 16) sts inc’d, 64 (70, 82, 88, 94, 100, 106, 112, 118) sts.
Cont even in patt as est’d until piece meas approx 6½”- 7” from cast-on edge, ending with a WS row.
This sleeve opening will have a circumference of approximately: 10 (10¾, 12½, 13, 13¾, 14¾, 15½, 16½, 17)” and rest near the elbow. You could always work fewer rows once you have increased to the full stitch count to make it even shorter. It is necessary to get to full stitch count before proceeding in the instructions to Body Increases, for the stitch pattern to work correctly.
In the next post, I’ll go over a few important points about knitting with UNIVERSAL YARN Cotton Supreme Waves and self-striping yarn in general, while the sweater starts taking shape! I hope I convinced you that swatches are our best tool for success, and to get to know your yarn before you start knitting your sweater.