
Measurements are a must when designing a custom garment. Yesterday I covered all the key numbers you need to collect for your soon-to-be masterpiece. Today we’ll convert those numbers to stitches and rows so that you can begin to knit a sweater vest with Universal Yarn Colorburst.

Colorburst comes in many different palettes, any of which would serve for a gentleman’s personal preference and panache.
Step 3 All the calculations

Texture and cables disrupt the self-striping pattern knit from Colorburst Yarn.
In the vest that I’m wearing in this photo, I experimented with abstract and asymmetrical textures and stitch patterns, because I wanted to visually disrupt the stripes and be playful. But I realize this isn’t everyone’s cup of tea, so for this project I will lead you through working in plain stockinette stitch. Friday, we’ll discuss what you would need to do if you choose to use a different stitch pattern say on the back of the vest, or just on the front.
Colorburst yarn knits on average to 23 stitches and 29 rows per 4” on size US 5 [3.75mm] needles. It’s a versatile yarn gauge-wise, so you could knit with smaller needles to achieve a slightly firm fabric or go up to even US 7 [4.5mm] needles for a lovely drape that still isn’t lace-like. For this project, we’ll stick with the gauge on the yarn label, though.

These measurements can be changed to make a custom fitting sweater vest for a man in your life, or yourself.
This vest is worked in two pieces and seamed at the shoulders and sides. A neckband and armhole edgings are picked up and knit separately. I knit these in a 2×2 ribbing, and did a waist band that way as well, so I’ll show you how to calculate the stitches for the chest measurement first and then how to modify that number for the cast-on stitch count and the ribbing.
When calculating stitches in knitting we use a few basic mathematical equations, and I always use a calculator and double or triple check all my work. The stitch gauge of 23 sts over 4” will be key.
For my vest with a width of 22” for the back and front, we need the same number of stitches to work up the torso. We know that 23 stitches are worked over 4”, but we need to know how many stitches we’ll have for 22”. I draw a simple chart like this.

I start with the number that I have on the diagram, which is 22” and cross diagonally to the opposite number, which is 23 and multiply these together, 22 x 23 = 506. Then I take this result and move to the third and unused number, 4 in this case, and divide 4 into the larger number, 506 ÷ 4 = 126.5. I have to round up or down because the result wasn’t a whole number. Before I do that, I want to see how a 2×2 ribbing would work with this number, as the best 2×2 ribbing on a piece that will be sewn to another similar half will consist of a multiple of 4, plus 2. 124 is a multiple of 4, plus 2 equals 126, so I’m rounding down instead of rounding up to 127. In the 2020s the ribbing is not as gathered or grippy as the ribbing that was customary on sweaters from the mid to late 20th century, where it was typical to decrease the waistband stitches by 10% or more and to use smaller needles. For my vest, I did go down to size US4 [3.5mm] needles for the ribbing, but I didn’t cast on 10% fewer stitches…so we’ll stick with 126 stitches cast on US4 needles and work ribbing as follows.
Row 1: K2, [p2, k2] across.
Row 2: P2, [k2, p2] across.
Repeat these 2 rows for the ribbing pattern.
I knit about 2¾” worth of 2×2 ribbing before changing to stockinette, but you can do as you wish. Then change to size US5 [3.75mm] needles for the stockinette up the Back piece of the vest. Work until the Back is 15” long. Now we need to do some more calculations.
The cross-back measurement determines how many stitches have to come off on each armhole side. On the schematic, you’ll see that we need to lose 2½” worth of stitches on each side, and the armhole shaping is a curve. The diagrams are always pictured as a neat curve, but in the knitting it’s a little more angular. Once the ribbing is worked in, the curved look shows up better.
So, I’ll use the same chart with different numbers and my math formula ends up as: 23 x 1.25 ÷ 4. This yields 7 stitches once I’ve rounded off. I take a rough third of this number for my initial bind off, the next rough third I decrease by ones every 2nd row, and the remaining stitches I decrease by ones every 3rd row. If I were using a chunkier yarn or a finer yarn, there would be a different way to achieve a curved slope, but we’ll leave it at this for now.
Your instructions would read as follows.
Bind off 3 stitches at the beginning of the next 2 rows. Then decrease 1 stitch on each edge every other row 2 times, and then decrease 1 stitch on each edge every third row 2 times.
This would bring you down to 112 stitches for the cross-back.
Work even in stockinette until the armhole depth is 9”. Now we need to calculate the slope of the shoulders.
The back of the neck is 8”, so using the same chart above we do 23 x 8 ÷ 4. This yields 46 stitches. We subtract 46 from 112 to get 66 stitches. We need half of 66 on each side of the upper back for the shoulders so we can use 33 sts. To create a slope, I usually cast off ⅓ of the shoulder at a time. The pattern would read.
Bind off 11 stitches at the beginning of the next 6 rows. Place remaining stitches on a holder for later.
The front is worked the same up to the beginning of the V-neck, but we’ll see that tomorrow because I’d also like to introduce you to steeking, and why I used it on this sweater vest. Knowing how to design your own vest is an exceptional experience, knitting with Universal Yarn Colorburst and Knitter’s Pride Karbonz is delightful.
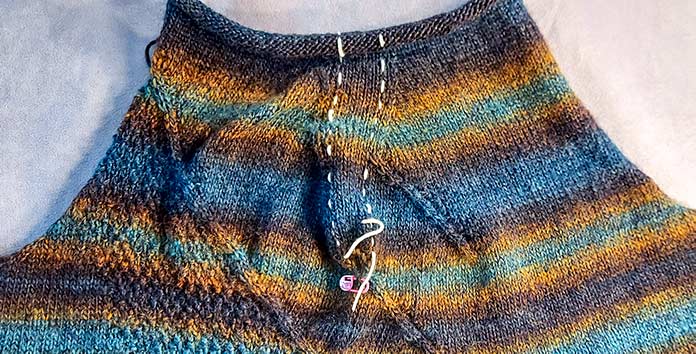
Those white stitches are placeholders to help guide me when I’m preparing the steek on the V-neck of this sweater vest.
This is part 3 of 5 in this series
Go back to part 2: Which measurements matter in designing a men’s sweater vest?
Go to part 4: Colorburst looks best with a steeked V-neck