In this series of posts, I’ve been working with Radiant Cotton yarn by Fibra Natura. In Tuesday’s post, I described how to wind a skein into a “cake” from which knitting is more of a joy, and yesterday I talked about the difference between knit-and-purl designs and ribbing.
Today, I’ll talk about the difference between text and charted designs and give you instructions to make a dish- or facecloth.

Radiant Cotton in its skein, or hank, put-up, and wound into “cakes”, ready to knit
Some knitters prefer text instructions, and some prefer charts. Rare is the knitter who is fine with both of them. While I prefer charts, I’m quite comfortable with either. Text knitting is a breeze when you keep sticky notes all over the house! (Think bookmark!) They work well for charts, too.
Charts are great for “visual people” — people who learn by seeing as opposed to by reading. I like charts because they generally provide a visual representation of what you can expect in your knitting. In this post, I’m going to be working with a pattern I found in a Japanese stitch dictionary. I started playing with on my fairly recent trip to China. It consists of 4 rows each of 2 rib patterns: one a 4 x 1 rib and the other a 3 x 2 rib.

Our themed rib for today — 4 rows of p4, k1 and 4 rows of k2, p3 — sort of.
Stitch dictionaries are great for expanding your knitting repertoire and they’re an enticement to play and sample with new patterns and yarns. I call this time “doodling with yarn,” and it can be very constructive. In fact, it’s how I branched into designing.

Stitch dictionaries are great! All of these are all written out in text format. Notice that the one on the left and the one on the bottom are the “knit and purl” volumes. These two are part of a series produced by each publisher. I bought the volume top right almost 40 years ago. You can tell by the bookmarks that it is well loved!
Charts, especially knit-and-purl charts, can easily be made with a spreadsheet. You can buy knitting software to make charts, but unless you’re designing, a spreadsheet or other grid you can fill in will do, especially for knit-and-purl patterns. Before technology, I used to use graph paper (I know, but, it’s all we had!)
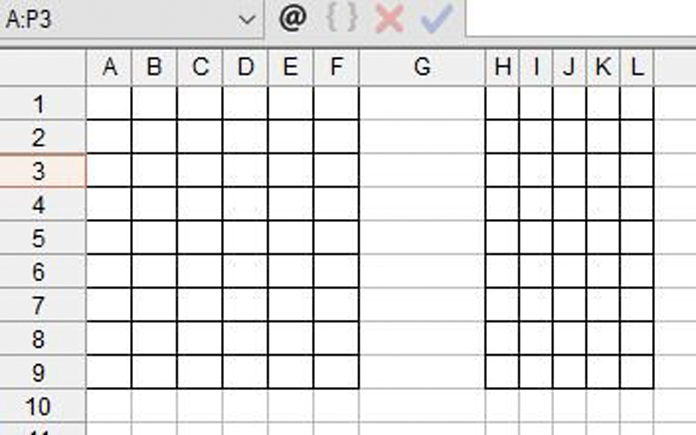
Size the cells so that they are square, or so there are roughly 4 cells high for every 3 cells wide. Some spreadsheets make this task easier than others.

The chart on the left has cells that are sized .18″ high x .24″ wide, which is roughly 3 rows wide for every 4 rows high, the approximate dimensions for stitches and rows of stockinette stitch. The chart on the right’s cells are square, at .18″ high and wide.
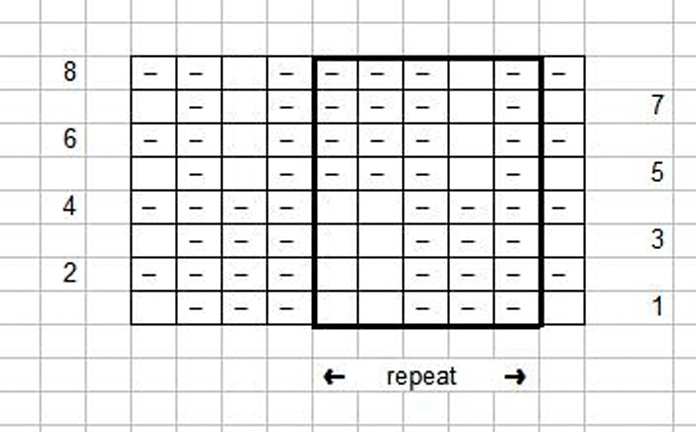
Next, you’re going to need some symbols. For knit-and-purl designs, this means you need 2, as there’s no k2tog, no yo, and no cables involved. There is no “industry standard” for knitting charts, but many books and magazines use a blank square for “knit on right side, purl on wrong side,” and a dash “–” for “purl on right side, knit on wrong side.” Some use a vertical line for the former instruction, and some use a “V” for it, to represent the “V” of the knit stitch as it appears on the right side, but I find that either of these tend to clutter up the chart.
To make our comparison, let’s look at what the text directions would be for the white knitted sample in the photograph above:
Cast on a multiple of 5 stitches
Rows 1 and 3: *p3, k2; rep from * across.
Rows 2 and 4: *p2, k3; rep from * across.
Rows 5 and 7: *p1, k1, p3; rep from * across.
Rows 6 and 8: *k3, p1, k1; rep from * across.
Doesn’t take up a lot of space, does it? But, here’s the chart:

When text is converted to chart, information can be compressed into a very small space.
Below, I’ve cropped out some of the knitting from my dishcloth to match it to the chart. See how the purl bumps form little dashes where the lines in the chart are?

You can ignore the half stitch on the bottom right of the photo — it got drawn in as part of the 3 x 2 rib.
Now, I want to take this pattern and make it into a dishcloth. I could just cast on a multiple of 5 stitches and knit what’s written above, but I want my cloth to be a bit more refined than that. I want to center the pattern across rows, and make it symmetrical at the top. I’d also like to have a selvedge of sorts to neaten up the sides of my work. So, here’s what I did:

With just a few more words, you can make an entire dishcloth from this one bit of instruction.
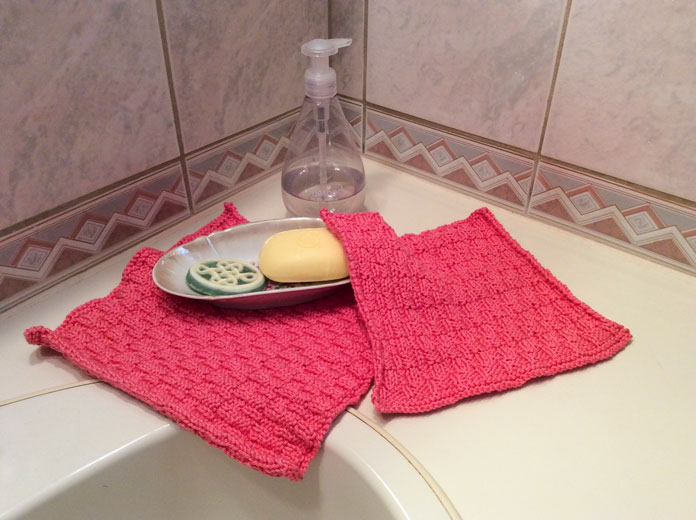
I call this piece the Nippon China Dishcloth because I saw this pattern in a chart from a class on my trip to Japan (Nippon) and China and we usually use a dishcloth on our china dishes. The larger size makes a perfectly lovely facecloth, and really glams up your daily bath!
I was able to get two cloths out of one skein of yarn by making one slightly smaller than the other. For the larger cloth I cast on 65 sts, and did 55 sts for the smaller one.
Here are the instructions:
Nippon China Dishcloth
materials
- 1 skein of Fibra Natura Radiant Cotton
- size 6 US [4mm] needles
gauge
Gauge isn’t important however to get both cloths out of one skein, you’ll need a tension of 25.5 sts to 4″ [10cm] over the pattern.
instructions
Cast on 55 (65) sts. K 2 rows. Work chart above or text below.
Rows 1 & 3: K1, *p3, k2; rep from * to last 4 sts, p3, k1.
Rows 2 & 4: K4, *p2, k3; rep from * to last st, k1.
Rows 5 & 7: K1, *p1, k1, p3; rep from * to last 4 sts, (p1, k1) twice.
Rows 6 & 8: K2, p1, k1, *k3, p1, k1; rep from * to last st, k1.
Repeat these 8 rows until work measures ½” [1cm] less than the width of the piece, then work rows 1 – 4.
K 2 rows. Cast off all sts and weave in ends.
I could have written Rows 6 & 8 to read “K2, *p1, k4; rep from * to last 3 sts, p1, k2. It’s a couple less bits of information. The reason I wrote it the way I did was to make it match the instruction in the chart. Even though I end up with an awkward “k1, *k3” near the beginning of the row, and an equally awkward “k1, k1” at the end, the asterisks and the semi colons in my text instructions show the start and end of the pattern repeats. This can be very helpful to knitters who come across an error in a pattern or the chart (and they do happen, despite our best efforts!)

Whether you use these cloths as face cloths or dish cloths, they’ll beautify your space.
For our fifth post with Radiant Cotton yarn, I’ll use the same stitch pattern, and expand it in both size and complexity to make a striped pillow cover. Join me tomorrow!
This is part 4 of 5 in this series.
Go back to part 3:
[shareaholic app=”follow_buttons” id=”23784471″]
