
Today I’ll wrap up this week’s feature yarn, Radiant Cotton by Fibra Natura. I’ll show you how to knit crossed stitches, which look like fabulous regal braided cording and are easier than knitting cables.

This is a top-down sweater for a toddler featuring centered decreases and sharp, lovely braided cord made of crossed stitches.
After knitting different swatches with this soft and shiny yarn, and focusing on a scalloped cast-on in yesterday’s post, I couldn’t help but move from swatch to sweater. So I started a top-down sweater for a toddler with a 20″ chest. I didn’t have enough time to make the whole sweater, mind you. I’m fast, but not that fast.
I kept some of the elements of the leaf lace swatch that I wrote about on Wednesday: the center double decrease and the yarn over and twisted stitch increases, and the crossed stitch cording. This panel without the leafs made for easy increasing around the yoke for my top-down design.
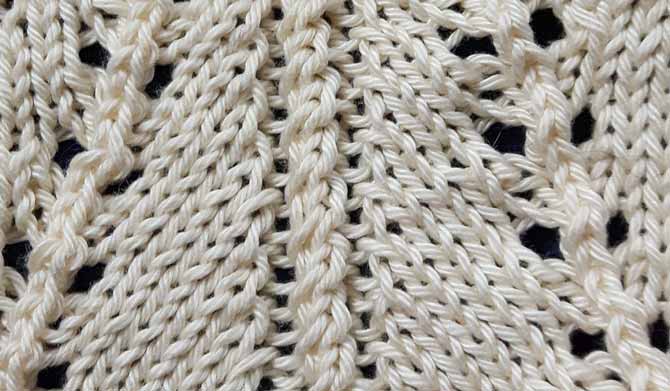
This top-down yoke has two main elements, the centered decrease and the 2-stitch crossed stitch cord which is set off by purl stitches.
The design element in this yoke that I like the most is the crossed stitches. In this case, I made all the stitches cross to the right, but it is possible to make them symmetrical and cross to the left as well, but we’ll leave that to another design.
To make a crossed stitch leaning to the right, insert the right-hand needle under the front leg of the second stitch on the left-hand needle and tug a little towards you and towards the tip of the left needle, too, but be careful not to take it so far that the stitch is passed over the first one.

Lift the 2nd stitch and bring the front leg forward to make it easier to knit into it.
Then remove the right needle and instantly re-insert it in the front leg of that stitch to knit it without removing it from the left needle.

Knit into the front leg of the 2nd stitch first, but don’t slip it off the LH needle
Then insert the right needle into the second stitch and knit it, removing both stitches from the needle. And that… is that.

Knit the first stitch and slide them both of the LH needle
I’ve run out of time, and won’t get this sweater done on time to post a picture of it. The crossed stitches are so quick to knit up than knitted cables, so it won’t take long. When it’s finished, I’ll be back to show it off.
When I set out to blog about Radiant Cotton, I really didn’t know what to expect. I have knitted for a long time, and I have used a lot of different cotton yarns. So basically, I came at this with no expectations at all. Truly.
This is part 5 of 5 in this series.
Go back to part 4: 1 cotton yarn that makes this scalloped cast-on edge stand out
1 comment
I’ve always found cables to be so time consuming – this looks much easier! ;)