I hope you found some leftover Radiant Cotton yarn to try the double knitting technique in my tutorial from yesterday’s post. Leftover yarn is fantastic for sampling new techniques.
A crumb catcher is a utilitarian and decorative knit project that, well, could be called a doily, but that doesn’t capture the fun nature of how it’s put to use. Holiday treats are lovely to display, but this snowflake motive will dress up the whole dish.

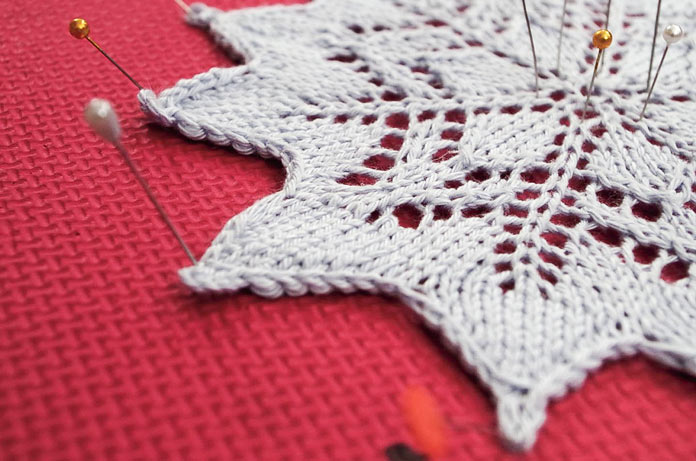
This knit doily is blocking so that it lays flat underneath some holiday goodies.
This crumb catcher is knit with some remnants I had of Radiant Cotton by Fibra Natura. It’s not so thin that it’s unwieldy to knit with, and it has a lovely sheen which makes it looks classy. To make this doily, I used a set of 2mm double-pointed needles to start, and then I changed to a long circular needle so that I could work with the magic loop technique.

This 12-point snowflake doily starts with 6 stitches.
One of the important aspects of knitting a circular piece that stays flat is to increase at the right rate. To figure this out, you need to do a little math.
I started with 6 stitches and doubled them in round 2, and worked round 3 as a plain round of 12 sts.
To get a flat circle, we need to increase the number of stitches we have from round 3 enough times so that by the time we get to double the rounds, in other words, round 6, we have double the stitches we had on round 3, so 24 sts. Then I multiply by 2 again and this tells me that by the time I get to round 12, I’ll need 48 sts. And to follow this sequence, by the time I get to round 24, I’ll need 96 stitches. But this is a little project, so I didn’t get that far.

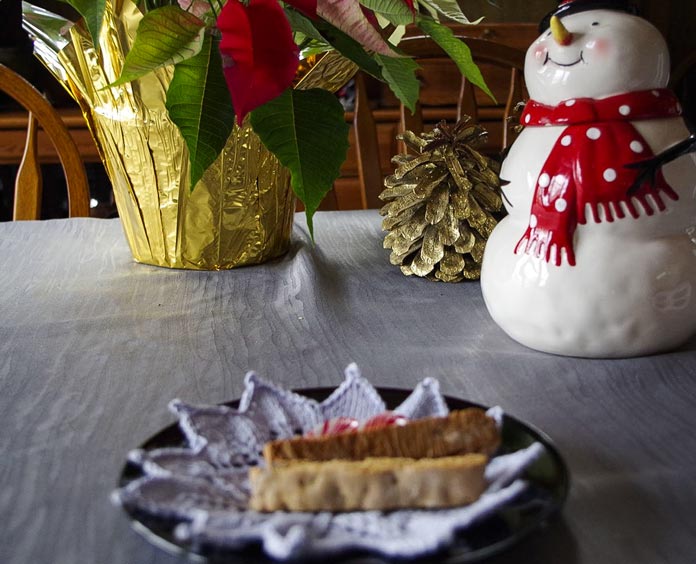
The snowflake crumb catcher is adding a delicate touch of winter to the festive table.
Bunny Ear Decrease
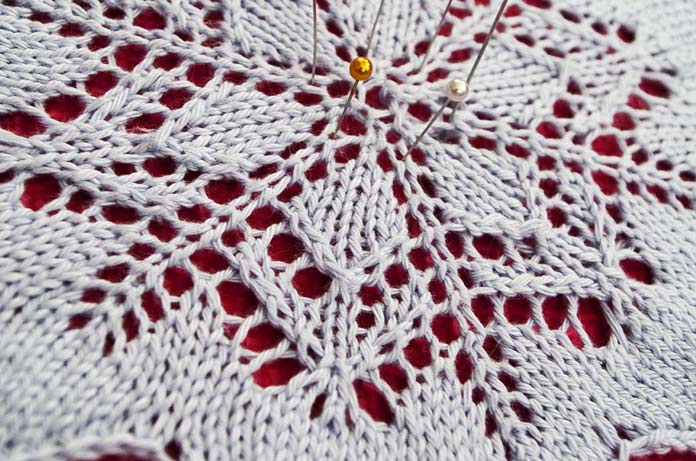
Another technique that I used on this snowflake doily is the bunny ear decrease. This involves decreasing a group of 3 stitches down to 2 stitches and maintaining a symmetrical alignment of the stitch legs.
To work the bunny ear decrease, knit the next 2 stitches together through the front legs (inserting the right-hand needle into the 2nd stitch before the first st). With the tip of the left-hand needle, from the back of the work towards the front, lift the left leg (it’s the back strand from what used to be the 2nd st on the left-hand needle) onto the left-hand needle.
Next, knit that loop together with the 3rd one on the left-hand needle but through the back loops (going first through the lifted strand and then the back leg of the next st). You have 2 sts resulting from that decrease that was worked over 3.

A six-point start ends up as a 12 point snowflake using yarn-over eyelets to create the lacy motif.
Crumb Catcher Pattern
With a set of 4 double pointed needles, and using the back-loop method, cast on 6 sts, and distribute them so there are 2 sts on each needle.
Rnd 1: Knit.
Rnd 2: [K1, yo] 6 times. 12 sts
Rnd 3: Knit.
Rnd 4: [K1, yo] 12 times. 24 sts
Rnd 5 and every odd round: Knit.
Rnd 6: [K1, yo, k3, yo] 6 times. 36 sts
Rnd 8: [K1, yo, k5, yo] 6 times. 48 sts
Rnd 10: [K1, yo, ssk, k3, k2tog, yo] 6 times.
Rnd 12: [K1, yo, k1, yo, ssk, k1, k2tog, yo, k1, yo] 6 times. 60 sts
Rnd 14: [K1, yo, ssk, k1, yo, sk2p, yo, k1, k2tog, yo] 6 times.
Rnd 16: [K1, yo, k1, yo, ssk, k3, k2tog, yo, k1, yo] 6 times—72 sts
Rnd 18: [K1, yo, k3, yo, k2tog, k1, ssk, yo, k3, yo] 6 times. 84 sts
Rnd 20: [K1, yo, k5, yo, bunny ears decrease, yo, k5, yo] 6 times. 96 sts
Rnd 22: [K1, yo, k6, kfb, yo, k1, yo, k1, yo, kbf, k6, yo] 6 times. 144 sts
Rnd 24: [K6, place locking st marker in the st just knit, k14, place locking st marker in the st just knit, k4] 6 times.
Rnd 25: Knit.
Now we begin the points which contain short rows. There’s a technique called a wrap and turn (w&t). When working on the knit side, you bring the yarn forward, slip the next st, take the yarn back, return the slipped st to the LH needle, and turn the work. On the purl side the yarn is already forward so you slip the next st, take the yarn back, return the slipped st to the LH needle, bring the yarn forward, and turn the work.
Rnd 26: K6, *k11, w&t, leaving rem sts unworked, p9, w&t, k8, w&t, p7, w&t, k6, w&t, p5, w&t, k4, w&t, p8, turn, bind off 7, work picot, bind off next sts until you reach marked st, knit marked st removing marker as you go, pass previous st over (one point made), k8, w&t, leaving rem sts unworked, p7, w&t, k6, w&t, p5, w&t, k4, w&t, p3, w&t, k2, w&t, p5, turn, bind off 4, work picot, bind off next sts until you have bound of next marked st, remove marker (next point made); rep from * around. Fasten off and weave in end.
Abbreviations
K – Knit
P – Purl
Yo – Yarn over
K2tog – Knit 2 together
SSK – Slip 2 sts knitwise, return to LH needle, knit 2 together through back loops
SK2P – Slip 1 st, k2tog, pass slipped st over
Kfb – Knit in front leg then back leg of same st to increase 1
Kbf – Knit in back leg then front leg of same st to increase 1
W&t – wrap and turn, see above note
RH – right-hand
LH – left-hand
Picot – [wrap yarn over RH needle front back to front and pass stitch on needle over wrap] 4 times, insert hook in front leg of stitch at base of chain just made, pass stitch on needle over this strand

Gluten free biscotti drop a lot of crumbs, but this crumb catcher is just as adept at keeping the holiday table tidy as is this snowman cookie jar.
When you knit up this little doily, enjoy the new techniques or perhaps review some old favorites. Remember that when there are too many stitches to fit neatly on the double-pointed needles you can change to a magic loop technique with a circular needle.
This is part 2 of 5 in this series.
Go back to part 1: Coasting right into double knitting
Go to part 3: How to knit and finish sturdy gift boxes
[shareaholic app=”follow_buttons” id=”23784471″]
