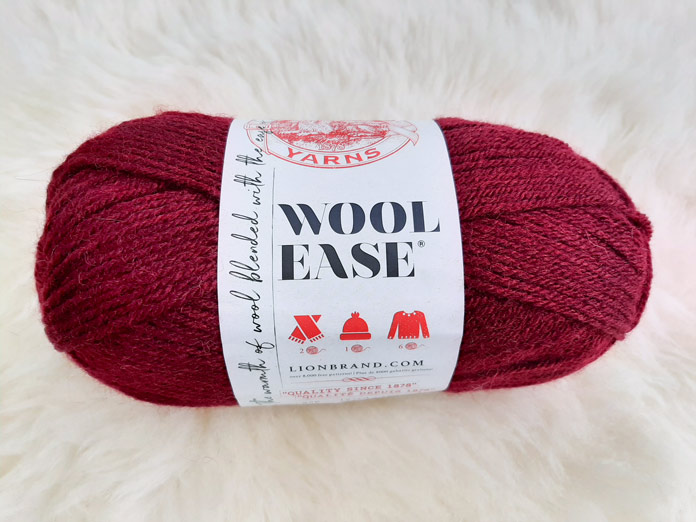
This week I’m knitting with Lion Brand Wool-Ease, which is a medium weight yarn that blends the warmth of wool with the ease of acrylic.
Today I’m knitting a hat that uses a few of the pattern motifs from the poncho that I’ll be making on Day 5. Based on the results from knitting swatches yesterday, I’ve determined the needle size that I’ll use to make the band and crown of the hat.

Lion Brand Wool-Ease is available in 12 different colors. I’ll be using Tawny Port for the hat.
I’ll to use Tawny Port for the hat today. It’s a rich burgundy color that should accentuate the pattern motifs I’ve selected.
The hat band will be knit first using two of the patterns from the poncho, then stitches picked up and knitted for the crown using two other pattern motifs. The hat band is worked flat, joined, and the crown is worked in the round using either double pointed (dpns) or circular needles.
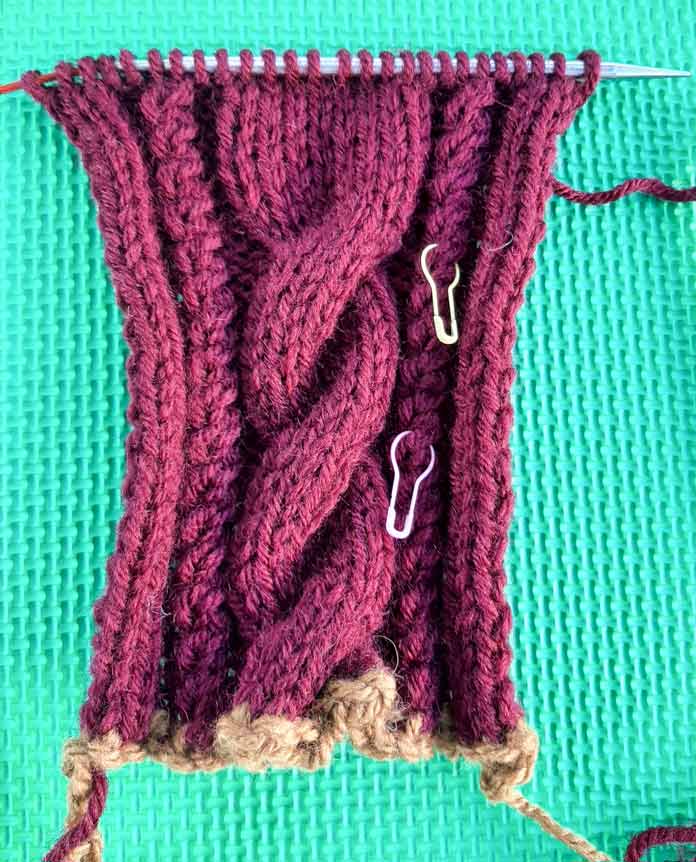
The pattern motifs I’m using on the hat band are the 4/4RC (4 over 4 right cross), which is also known as a C8F cable stitch, and 1/1RC (1 over 1 right cross). The 4/4RC is performed on the 5th row and every 10th row afterwards while the 1/1RC is performed on every right side row, i.e., every 2nd row. Sometimes, it can be a challenge to count the rows to know if you’re on the 8th or 10th row of a cable pattern. An easy tip for keeping track of your rows is to use a removable marker to tag the 1/1RC on the same row as the 4/4RC. This way, you only need to count the number of 1/1RC rows to know when it’s time to do the 4/4RC.

Use a removable marker to tag the 1/1RC on the same row as the 4/4RC.
As you can see from the picture above, I opted to use a provisional cast on to start my hat band with the intention of either grafting the ends together with Kitchener stitch or using a 3 needle bind off. I haven’t had very good results in the past when grafting in pattern so I consulted with 2 of my knitting buddies that are both experienced knitters. Neither of them have had good results in the past and both ended up doing a 3 needle bind off instead. That’s what I ultimately did to join the hat band but to be perfectly honest, it was more trouble than it was worth. It would’ve been easier to just cast on and off and seam the two ends together so that’s the instructions I’m giving in the pattern. Why complicate it. But I must say that tagging the 1/1RC to count the rows for the 4/4RC made the job much easier.
The Hat Pattern
materials
yarn
- 3oz [85g] ball of Wool Ease in Tawny Port
needles and hook
- US7 [4.5mm] crochet hook or close in size
- US7 [4.5mm] knitting needles
- US8 [5.0mm] 16” circulars or 32” circulars for magic loop, or dpns
- cable needle
notions
- stitch marker
- tapestry needle
finished measurement Fits a 20 – 22” head.
gauge
Band
6 rows = 1” in pattern on a US 7 [4.5mm] needle. Note the row gauge is important to the finished size. To make the hat larger, use a larger sized needle.
Crown
20 sts = 4” in pattern on a US 8 [5.0mm] needle. To make the hat larger, use a larger sized needle.
abbreviations
K = Knit
P = Purl
St(s) = Stitch(es)
PM = Place Marker
BOR = Beginning of Round
Rnd = Round
Dec = Decrease
kfb (knit in front and back) Knit next st without removing it from left needle, then k through back of same st – 1 st increased.
CDD (Center Double Decrease) Slip 2 sts knit-wise, then slip 1 st knit-wise and knit all 3 sts together through the back – 2 sts decreased.
1/1LC (1 over 1 left cross) Slip 1 st to cable needle and hold in front of work, k1, then k1 from cable needle.
1/1RC (1 over 1 right cross) Slip 1 st to cable needle and hold in back of work, k1, then k1 from cable needle.
4/4RC (4 over 4 right cross) Slip 4 sts to cable needle and hold in back of work, k4, then k4 from cable needle.
The Hat Band
With crochet hook and US 7 [4.5mm] needles, cast on 26 sts and leave a long tail for seaming.
Set up Row: P3, K2, P2, K2, P8, K2, P2, K2, P3.
Rows 1 & 3: K3, P2, 1/1RC, P2, K8, P2, 1/1RC, P2, K3.
Row 2 and all even rows: Work sts as presented; i.e., Knit the knits and Purl the purls.
Row 5: K3, P2, 1/1RC, P2, 4/4RC, P2, 1/1RC, P2, K3.
Rows 7 & 9: Same as Row 1.
Work these 10 rows 11 more times.
Cast off in pattern, but do not cut yarn.
With the tail, sew the band together to form a circle.
Crown
With right side of the band facing, pick up and knit 96 sts, PM to mark BOR. Remember to slip the marker on each round.
Knit 1 round.
Increase Rnd: *K5, kfb, repeat from * to end of round. 112 sts
Set Up Rnd: *K8, P2, K4, P2, repeat from * to end of round.
Rnd 1: *K3, 1/1RC, K3, P2, 1/1LC, 1/1RC, P2; repeat from * to end of round
Rnd 2 and all even rounds: Work sts as presented; i.e., Knit the knits and Purl the purls.
Rnd 3: *K3, 1/1RC, K3, P2, 1/1RC, 1/1LC, P2; repeat from * to end of round
Repeat these 4 rounds 3 more times.
Start Decreases:
Dec Rnd 1: *K3 K2tog, K3, P2, 1/1LC, 1/1RC, P2; repeat from * end of round. 105sts
Rnd 2 and all even rounds: Knit.
Dec Rnd 3: K6, CDD, *K12, CDD; repeat from * to last 6 sts, K6. 91 sts
Dec Rnd 5: K5, CDD, *K10, CDD; repeat from * to last 5 sts, K5. 77 sts
Dec Rnd 7: K4, CDD, *K8, CDD; repeat from * to last 4 sts, K4. 63 sts
Dec Rnd 9: K3, CDD, *K6, CDD; repeat from * to last 3 sts, K3. 49 sts
Dec Rnd 11: K2, CDD, *K4, CDD; repeat from * to last 2 sts, K2. 35 sts
Dec Rnd 13: K1, CDD, *K2, CDD; repeat from * to last st, K1. 21 sts
Dec Rnd 15: *CDD; repeat from * to end of round. 7 sts
Cut yarn and draw through remaining 7 sts to close up. Weave in ends.

The finished hat with Wool-Ease in Tawny Port.
I’m very pleased with the end result. Tawny Port was an excellent choice for highlighting the patterns of the hat. It also fits really well, so I’m claiming it for me. Think I’ll make another band with the leftover yarn as it will make a great headband – warm and beautiful. That one I’ll give to someone in their stocking.
I hope you’ll join me tomorrow as I continue to use Lion Brand Wool-Ease in Tawny Port to make a pair of hand warmers (or are they mittens) to go with my hat, leveraging a couple of other pattern motifs from the poncho!
