This week I’m determined to find a multicolor technique to use with Universal Yarn Bella Cash, our star yarn this week. Knitting in the stitch below just may be the answer.

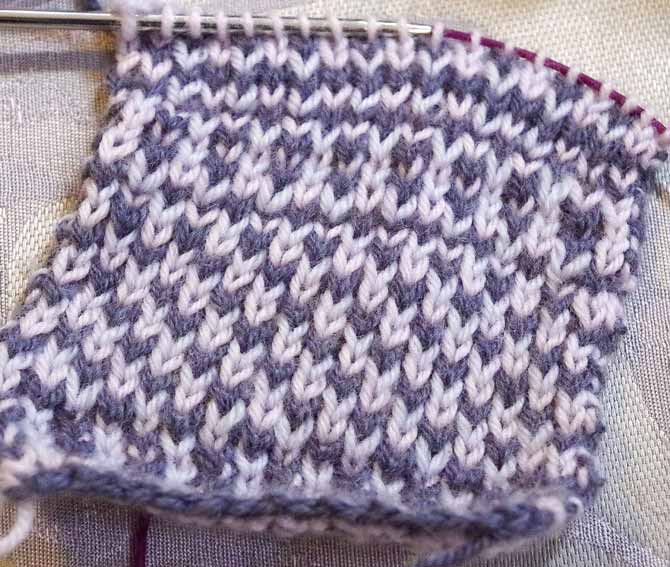
These 2 grays are a perfect contrast for knitting in the stitch below.
So as I say “Don’t call me, I’ll call you” to yesterday’s effort in Brioche knitting, today I say “Hello” to knitting in the stitch below. This technique involves either purling or knitting into the stitch one row below the row you’re working on. When a new stitch is formed via knitting through the stitch in the row below, it basically “unravels” the stitch that was on the left needle. Both the lower stitch and the loop of the stitch on the left needle come up and around the new stitch.
If you were to knit 1 below across a whole row, you would basically unravel it and have a complete mess, but by deliberately selecting certain stitches to knit below, you can develop a lovely sequence of texture. I think that this technique looks nicest in more than one color, so, since I have these 2 lovely grays and the pale rose of Bella Cash blush, I can tuck in.

You only have to use 1 color per row, but by knitting in the stitch below with multiple colors, you get this lovely effect.
You can see I tried several different approaches in this swatch, using the 3 colors and different sequences of knit 1 below stitches. In the part that curled up, I knit 1 below every other stitch and knit the others, then purled across with a third color, carrying the first one. It really didn’t look right, even though the section that it is curled up is kind of nice. You’re not missing anything.
In the middle section — the one I like the most — I did the following over an even number of stitches.
Row 1: [With color 1, k1 below; k1] across.
Row 2: [With color 2, p1 below; p1] across.
Row 3: [With color 3, k1 below; k1] across.
Row 4: [With color 1, p1 below; p1] across.
Row 5: [With color 2, k1 below; k1] across.
Row 6: [With color 3, p1 below; p1] across.
Repeat these 6 rows for the pattern.

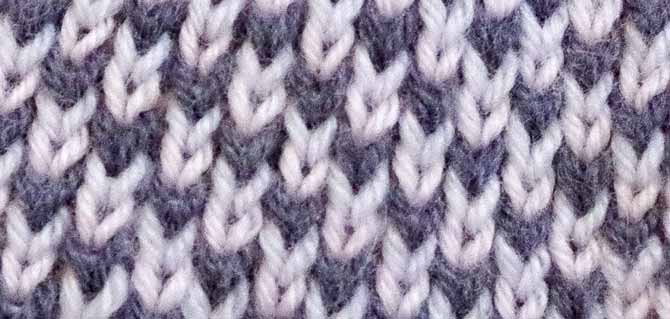
A close-up of the middle section of my swatch shows how altering the “worked in the row below” stitches creates this diagonal shift in the colors.
Next, I tried the following, but it really wasn’t all that appealing to me.
Row 1: [With color 1, k1 below; k1] across.
Row 2: [With color 2, p1 below; p1] across.
Row 3: With color 3, knit across.
Row 4: [With color 1, p1 below; p1] across.
Row 5: [With color 2, k1 below; k1] across.
Row 6: With color 3, purl across.
So I quickly changed it to this.
Row 1: [With color 1, k1 below; k1] across.
Row 2: With color 2, purl across.
Row 3: [With color 3, k1 below; k1] across.
Row 4: With color 1, purl across.
Row 5: [With color 2, k1 below; k1] across.
Row 6: With color 3, purl across.

Two variations of the knit 1 below stitch make different colors stand out

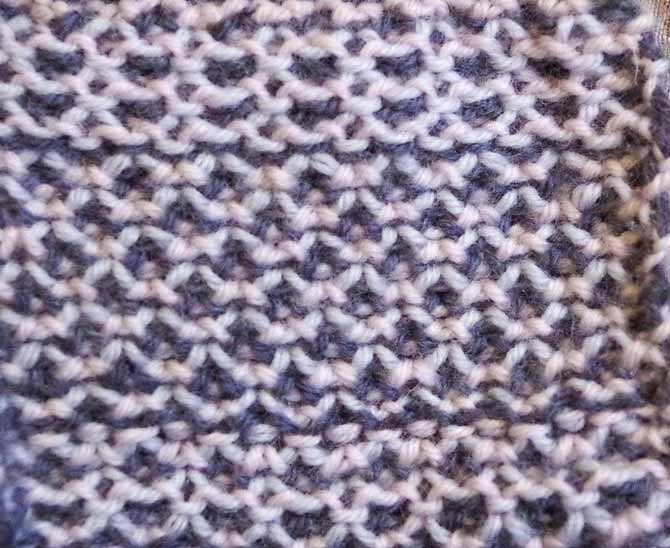
The contrast between the light and dark colors creates a stacked bead motif or a honeycomb look on the “wrong” side of the work. There’s no reason you couldn’t make it the “right” side!
The reverse side of this swatch is also very appealing to me. It’s a neat and tidy display of what I call yarn hugs. The contrasting strands of one color reach up and hold on to the loops of the next color used. It reminds me of a circle of cut-out paper dolls holding hands.
If you’d like to learn a whole lot more about Knit One Below, there is a book by that title written by Elise Duvekot which has loads of information about technique and many lovely patterns to practice them on.
Tomorrow we’ll look at my last swatch with Universal Yarn Bella Cash, where I explore texture!
This is part 4 of 5 in this series.
Go back to part 3: What I learned about Brioche knitting

2 comments
Whoa! This is gorgeous; I really want to try this stitch.
Thank you this info – I am a new knitter and this info is awesome
Thank you
Hugs