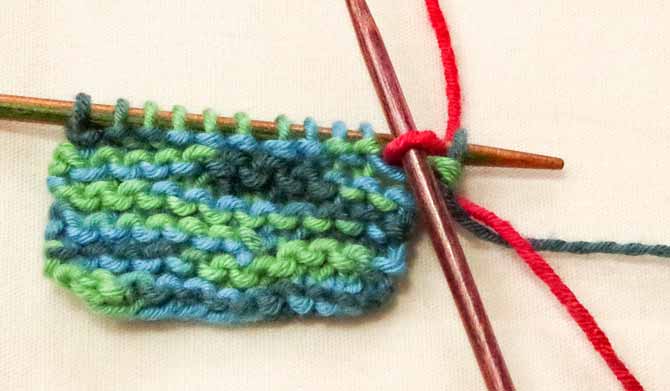
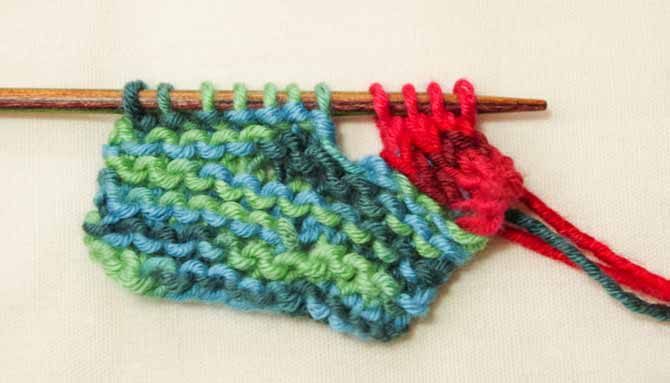
A couple pairs of socks and a shawl later (see yesterday’s post), I thought how fun it would be to have a different sort of edging along the top of a sock or the length of a shawl. This week we’re exploring non-allergenic yarns Allegro and Naked Sock by Wisdom Yarns and I’ll demonstrate how to make an i-cord edging with 2 of these yarns.

Naked Sock Oceanic colorway in a small garter stitch swatch
I’ve knit a little garter stitch swatch in the Oceanic colorway of Naked Sock, and I’d like to show you how I add on an I-cord edging.
I-cord is the termed coined by knitter extraordinaire, Elizabeth Zimmerman, and it means idiot-cord, named as such because she used these to attach pairs of mittens to each other. Thus, any idiot would be prevented from losing one of their hand-made mittens.
If you have ever knit with a French knitting loom, or done spool knitting, with 4 or 5 nails inserted around the hole of a wooden thread spool, you’ve made an I-cord. At least, the wooden spools was my first exposure to the i-cord. My dad made me one when I was 5. Nowadays, you can find i-cord looms with little cranks that make it possible to churn out yards of i-cord painlessly. Perfect if you want to wrap the i-cord into a coil and stitch it together to make a flat round or oval item.
But if you made an i-cord on its own, it would certainly be quite tedious to try to sew it on as an edging to knitting, so I propose this knitted-on version. You’ll need 2 double-pointed needles to achieve this edging.

First stitch of cable cast on

Placing the cable cast on stitch back onto the left needle
The first step is to use the cable cast on to add 4 stitches to the current swatch. To do this, insert the needle between the first and second stitches on the left-hand needle and knit up a loop, twist the right needle so that you can return the new loop to the left needle. Then repeat this 3 more times.

These four stitches will make the i-cord edging
.

Knitting the 4th stitch together with the first stitch from the main work.
The next stage is to knit the first 3 stitches of the i-cord, and then knit the next 2 together through the back loops, joining the cable cast on to the body of the swatch. Some people prefer to slip the third stitch, knit the fourth and pass the slipped stitch over. Then slide the 4 stitches to the opposite end of the needle, converting it to a left-hand needle. Knit the first 3 stitches and work the 4th and 5th together in your preferred manner.
If you knit 1 round of i-cord for each stitch that is on the needle, you may end up with a buckle in the fabric. When picking up stitches along a stockinette stitch edge, we usually don’t pick up a stitch for every row either, because stitch gauge and row gauge aren’t symmetrical. Many knitting books and designers recommend picking up 3 sts for every 4 rows of stockinette. In the case of the i-cord, it is essentially a little tube of stockinette stitch, so this would also mean that the number of rounds on the i-cord would not correspond exactly to the number of stitches along the edge we are knitting on to. To solve this, we knit 3 rounds of i-cord, and join to 3 stitches, and then we work one round on the i-cord where we knit the 4 stitches and slide them back to the other end of the double-pointed needle without a join. This is how to avoid a curved or buckling i-cord edging.

Knit 1 plain round every 4th row to avoid buckling or flaring.

Finished I-cord edging from the right side

Finished I-cord edging on the wrong side of the fabric
I went exploring a little further with this i-cord edging and tried to go around a corner. I’m not thrilled with how it turned out, so I need to experiment a bit more before I give you any tips on how to achieve a nice corner. Tomorrow we’ll look at a different way to use i-cord as an edging.

My first messy attempt at working the I-cord edging around a corner
This is part 3 of 5 in this series.
Go back to part 2: Non-allergenic shawls and socks with Allegro and Naked Sock yarn
Go to part 4: Using a knit I-cord as a cast-on technique

5 comments
Thanks for such clear instructions ! I will use this edging in the future for sure!!
Thank you for the information! I need all the help I can get! :)
Great tutorial! I am looking into getting into knitting. Will save your blog for reference!
Thank you for the Clear instructions. I haven’t done this before but am anxious to try it now :)
The green and blue yarn is soooo pretty!