
This week I’m having fun dyeing yarn with Rit All Purpose Dye and Ready to Dye Yarn from UNIVERSAL YARN.
Yesterday’s Snow Dyeing exercise resulted in a very random colorway that was quite pleasing. Today, I’m dyeing with a specific purpose in mind – to dye the yarn for use as a warp on my Rigid Heddle loom. The desired outcome is to have a striping effect of various colors, but not perfect stripes. I want them to fade from one color to the next in a whimsical fashion.
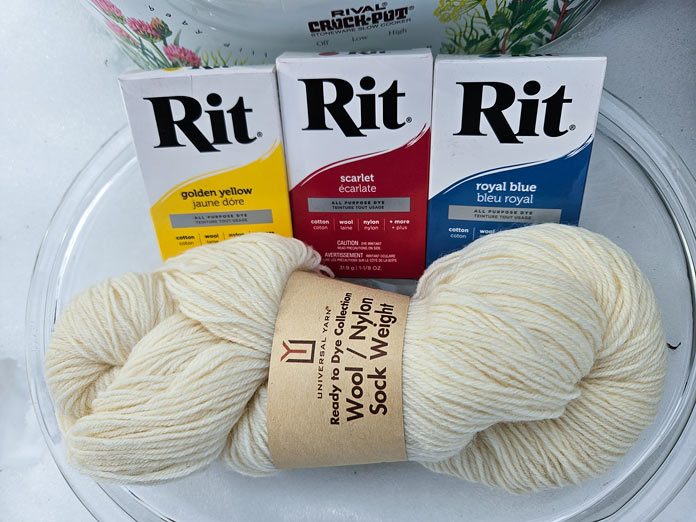
Rit All Purpose Dye in Golden Yellow, Scarlet and Royal Blue with UNIVERSAL YARN Ready to Dye Superwash Wool and Nylon Sock Weight yarn
I originally planned on using the primary colors of Golden Yellow, Scarlet and Royal Blue for dyeing the Wool / Nylon blend of sock weight yarn thinking that I could mix and match the colors to create different shades. This time, I’m mixing the powder to create liquid dyes that will be applied to the warp yarn.
Using the condiment squirt bottles, a funnel, the measuring spoons, and wearing a mask and gloves, I placed a ¼ teaspoon in each bottle. It was easy to scoop the powder out of each spice jar with the measuring spoon. Then I poured 4oz of hot water into each container, attached the lids and gently shook each bottle to dissolve the powder. It was at this point that I decided to mix up a batch of the Teal powder. By the way, the lids were not leak-proof so I’m really glad I was wearing gloves.
To prepare the yarn, I wound it using my warping mill to the length I wanted for my warp. I secured different sections together and soaked it for an hour or so in a fairly hot water bath along with some vinegar.
To prepare for the dyeing, I spread out the shower curtain liner on my back deck, laid strips of plastic wrap, and then arranged the yarn into sections and lengths. As it turns out, my liner wasn’t as long as the yarn so I had to squish it up a bit to get it all on.

The warp yarn arranged on the plastic wrap on top of the shower curtain liner
Now for the creative part – painting the warp. This step can be done with foam paint brushes but I couldn’t find mine so I squirted my dye and squished it as I went along. I wasn’t after perfect stripes of color but rather free-range stripes, so to speak.

The dye is squirted onto the yarn in lengths and then squished together to blend the colors.
This can be a very messy process, so working outdoors with gloves, old shoes that were easily removed, and my paint clothes was the right choice. I’m glad I opted to include the teal as it has a lovely effect with both the yellow and blue on either side. I also decided I didn’t want pure red, so I squished the red stripes with some of the blue stripes to create more burgundy or purple striping. The same applied to the yellow. I didn’t want yellow but rather variations of green by squishing the yellow with the teal to one side, and with blue on the other. This was both creative and fun, but a little tough on the back. It would’ve been easier to work at table height.
Once I was satisfied that all the color was applied to my liking, it was time to wrap it up in strips of plastic wrap. I wrapped the different strips of plastic around the yarn sections where the colors could blend a little; meaning, the red was wrapped with some of the blue, some of the blue was wrapped with the teal, the teal with the yellowish green, and then with the blue. Then I wrapped the yarn into a coil and popped it into a zipper locking bag. Now it’s ready for steaming to heat set the dye.

The strips are wrapped in plastic, coiled, then placed in a zipper-locking bag.
After the steaming process was done and the yarn cooled, I rinsed the skein under cool water and hung it to dry.

The color transition of the stripes is exactly what I was hoping to achieve.
Behold the wonder! I was very pleased with my color transitions and glad that I didn’t go for pure red or yellow. The blend with the adjoining colors was perfect. Now for the hard part, getting the skein back in order so I can warp my loom.
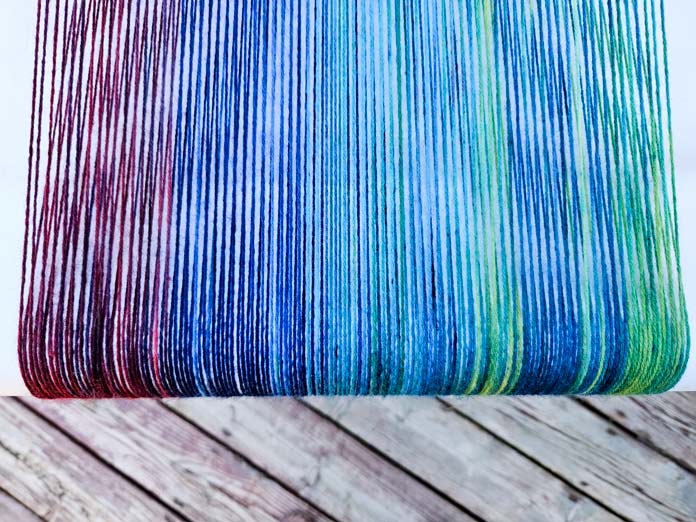
Whimsical stripes of warped yarn on a Rigid Heddle Loom
I’m very pleased with the whimsical striping effect. It looks great on the loom. But what do I use as my warp? If I had more of the yarn available, I would’ve used the remaining dye liquid to make a matching color. I’ll have to ‘shop my stash’” to find the perfect match.
Not wanting to waste a single drop of the remaining dye, I combined the teal and golden yellow into a single bottle, then added half of the blue to that bottle and the other half to the leftover red. I raided my crochet cotton stash once again and soaked two skeins in a hot water and salt solution. This time, I emptied each bottle of liquid into a zipper-locking bag and added a skein of cotton. Then I immersed the bags into my slow cooker and let it cook for several hours. When I removed the two skeins there was still lots of color left in each bag, so I repeated the process with two more skeins.

Crochet cotton stash yarn used to soak up the remaining liquid dye of the Golden Yellow/Teal/Royal Blue and Scarlet/Royal Blue Rit dye
There’s a noticeable difference in the intensity of color between the 1st and 2nd skeins, but they go together beautifully.
The warp painting process was a fair amount of work but the results made it all worthwhile. Next time, I’ll do the painting on top of a table to make it easier on my back. Tomorrow’s process of Kettle Dyeing will be much easier. I hope you join me as I use the Rit All Purpose Liquid to dye my last skein of the UNIVERSAL YARN Ready to Dye Yarn.
This is part 4 of 5 in this series
Go back to part 3: Snow dyeing yarn for a random effect – 8 steps to a variegated look
Go to part 5: Kettle dyeing with a slow cooker and liquid dye – yarn coloring