
Our journey this week is a knitted trick-or-treat bag using Red Heart Reflective yarn to keep your ghosts and goblins safe on Hallowe’en. Yesterday we began with three cast ons to get the base of our jack-o-lantern pail onto the needles. Today, we’re going to look at increasing the number of stitches to form a flat circle.
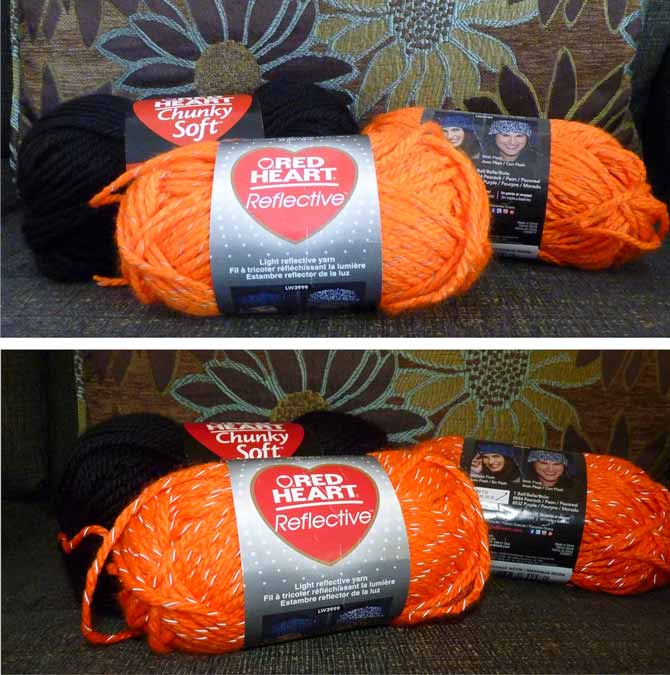
Top: by day, Reflective is mild-mannered, but add headlights or a camera flash (bottom), and Reflective shows its bolder self.
There are three basic ways to form your circle: spiral, spoke, and Pi-shaped.
The convention for making a center-out piece of knitting lay flat is to increase 4 stitches every row or 8 stitches every second round.
When single increases are made every round at the same 4 points each time, or when increases are made before and after a stitch at the same point every second round at the same 4 points, they form a square.
When increases are placed at the same point at 8 spots in a round, they form an octagon. Circles can have their increases placed at other intervals by varying the number of rows in between. A circle shaped at 6 intervals per round will resemble a hexagon in shape, and one with 10 intervals per round will make a decagon (there’s a word you don’t see every day!)
Putting more “sides”, or intervals, into a circle will produce a more gently arcing shape. Generally, though, knitted circles have 8 sides, leaving us to rely on blocking to coax our octagon into a curvy arc.
Another general practice of knitting circles from the center out is to begin with the same number of stitches as you will have intervals: if you’re doing a pattern that has 6 repeats per round, you’ll begin with 6 stitches; if your pattern has 8 repeats per round, you’ll cast on 8 stitches.
Spiral shaping
Spiral-shaped circles are often seen in circular baby blankets, the backs of baby bonnets, and some afghans. The swirly spirals can curve to the left or to the right, depending upon where the increases are made. The sample in our video swishes to the right, which means the increases have been placed at the start of each repeat.
Our video begins where we left of yesterday after the Emily Ocker cast on and first round. At the 5 minute mark, I show how to place stitch markers to indicate where increases should continue to be made. At 9 minutes and 11 minutes I give “secrets” regarding the pattern, and at 10 minutes, I talk about my strategy to keep the circle flat once it comes off the needles.
Knit a spiral circle

The finished spiral circle, with a garter stitch edge
Spoke shape
The spoke shape of circle is the one that most closely resembles a spider’s web. Since our project is a trick-or-treat basket for Hallowe’en, this shaping is suitably spooky for our project!
This sample is also based on an “8-sided circle”, but instead of increasing 8 stitches every second round, we are going to make double increases at each of the 8 spokes (16 increases per round) every 4 rounds. This video is a continuation of the invisible circular cast on in yesterday’s post. At the 2 minute mark we begin to set the pattern. The tips contained in this video will help prepare you for knitting the bottom of our basket.
Knit a circle with spokes
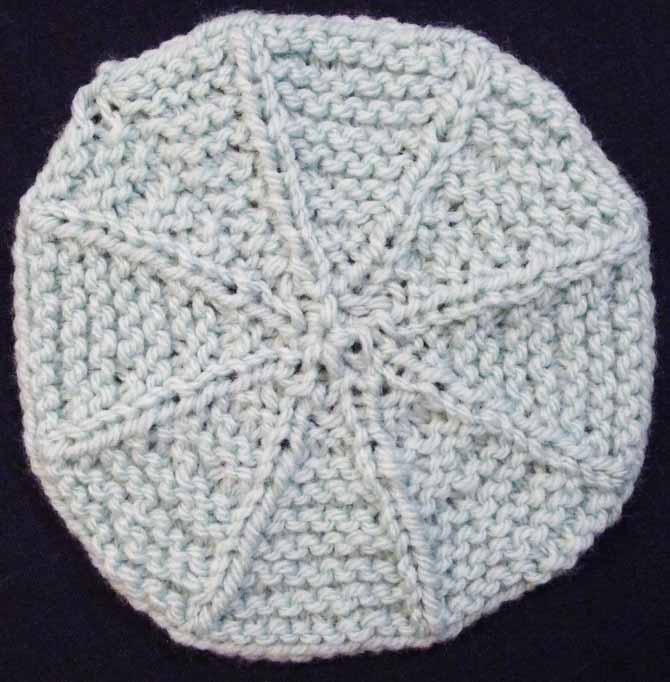
The finished spoke circle
Pi-shape
The Pi-shaped circle is based on the principle of Pi, where the number of stitches (the circumference) doubles every time the number of rows (diameter) does. It expands quickly in the beginning, and the circle will voluntarily lay flat up to about 128 stitches. Beyond that, the rapid doubling of stitches on a single round followed by more and more rounds between the increase rounds pose some structural challenges that have to be sorted out. Blocking can address some of them, but sometimes other solutions need to be investigated.
The Pi circle begins with a small number of stitches (say 8), followed by a knit round. Then, you double the number of stitches (to 16) and knit 2 rounds. Double the number of stitches again (32) and knit 4 rounds. Double the stitches again (64) and knit 8 rounds before the next increase round which will get you to 128.
A tip I’ve learned for making Pi circles is to knit only about half of the number of plain rounds between the last increase round and the edge. This prevents the outside edge of the circle from ruffling or pulling in too much.
In the video, the early increases are made as “closed” increases (I used m1 or make 1 increases), and the ones toward the outside are made with “open” yarn over increases.
Pi shaping for a knitted circle

The Pi-shaped circle uses make 1 (m1) increases to get to 16 and 32 stitches and yarn over increases for the rounds to bring the stitch counts to 64 and 128
Try each of these samples. Knit along with the videos, or start with the videos and branch out on your own. Start with 5 stitches and create that decagon! Send us comments and photos of your results; we’d love to see them!
Tomorrow we begin our Hallowe-en trick-or-treat bag.
2 comments
Thank you so much for this interesting article! I’ve been searching for such articles: you can, of course, follow patterns in order to achieve e.g. a circle, but I’m keen on learning the theory behind it.
how can I get printed patterns for these 3 spiral circles