
I don’t mean to be disrespectful, but Aunt Lydia is a bit of a blockhead. I suppose I am, too. It’s not that we’re dense, it’s just that we share a secret about how great blocking is. So, if there are gearheads and radioheads, she and I are blockheads.
I make no secret about the magic of blocking! Crochet threads are literally made to be turned into lace, and Aunt Lydia’s Classic 10 crochet thread is no exception! Being made of mercerized cotton, you can really stretch the fabric to open up pretty well any lace design. Have you seen the sample lacework knits in yesterday’s post?

In addition to coming in 55 solid and variegated colors, Aunt Lydia’s Classic 10 crochet thread also comes in 5 colors that have a metallic strand in them. Shown is silver/ silver.
Lace knitting is one of my favorites of all the knitting techniques. I always encourage confident beginning knitters to try it. And lace really shines when you have a yarn that blocks well.
So far in this series, I’ve made three swatches:
One made from a single strand of red,
One made using two strands of red held together, and
One made using Aunt Lydia Classic 10 metallic for our Horseshoe Lace Bridal Bolero

Remember this sample from my last post? Take a close look – it will be transformed in the next photo!
Blocking can be done “light,” “medium,” or “hard.” Light blocking can be as simple as laying out a piece and giving it a light steam – this method is often done with woolen pieces that are knitted fairly close to the finished measurement.
Hard blocking is often reserved for lace, where opening the eyelets of the fabric is desired.
Blocking, like other aspects of knitting, is more enjoyable when you have good tools. For blocking samples, you need rustproof pins, a porous surface on which to pin, a towel, a notebook and a pen.
For blocking samples, you can use the top of an ironing board or a child’s foam puzzle mat. For garments, though, you’ll need a larger surface. That’s when the interlocking floor mats can be heaven sent!
For pins, it’s important to have pins that won’t rust. Many pins are made from nickel plated steel, and sometimes the steel rusts through the nickel coating. Look for stainless steel pins or nickel coated brass pins. These are sometimes sold as “silk pins.” Regardless, read the fine print to be sure your pins won’t rust.
The towel is simply there to remove excess moisture out of the sample.
Because I take borderline meticulous records, I need the notebook and pen. I measure my sample before I wet it, block it out to another measurement, and then measure my sample again, a few hours after it’s been removed from the blocking board.
After I record my first measurements, I wet the sample and wring it out in the towel. I lay it out on the board, and I pin out the 4 corners. Then, I measure “compass points” in the middle of each side of the square.

The first step in blocking (after wetting the sample) is to pin out “compass points.”
From here, there are several ways to proceed. If your sample has a longer edge, you might wish to place pins between the corner and center pins on each side. If the sample is more square, and 6″ or less, you can begin placing pins about ½” apart along each side. Work a few pins on one side, then move to the opposite side to make sure the swatch is drawn out evenly from side to side.

In this “secondary pinning,” pins have been placed in between each corner and center-of-the-side pins. I use the naturally forming lines in the lace pattern to help me place the pins at equal points opposite one another.
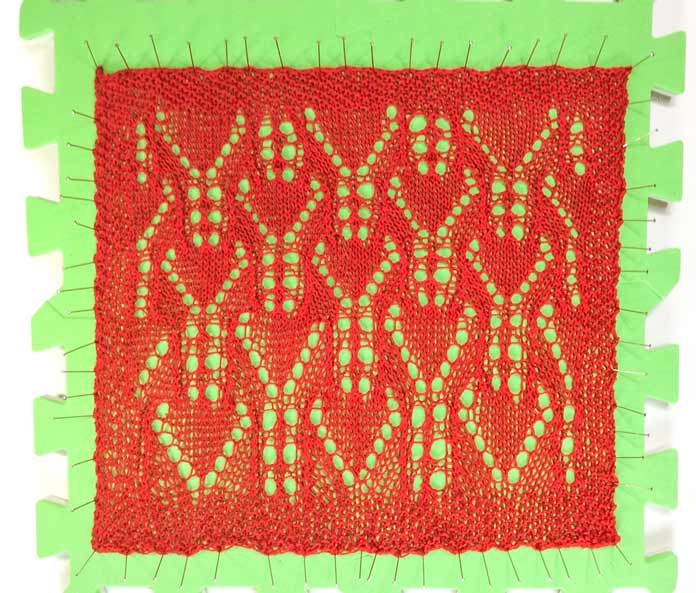
Once the pinning is complete, the sides shouldn’t have any of the scalloped edges seen in the previous photos. If scallops cannot be eliminated, re-pin to slightly smaller measurements. Even on the blocking board and after it comes off, you can still see the difference in the tension from where I changed needles on this sample!
The single strand sample measured
9″ x 7″ [22.5 x 18cm] before blocking,
9¾” x 9″ [25 x 23cm] pinned and
9½” x 7¼” [24 x 18.5cm] a couple days after it was removed from the blocking pins.
Why am I doing all this measuring? Well, the before blocking measurement provides a base number. Depending on how the pattern was written, it can even tell me what my knitting tension should be. If the pattern just says “x sts and y rows to 4″, unblocked,” the first set of numbers is what I need to aim for when I’m knitting.
The measurement on the blocking board is the one that the pattern gauge is apt to be based on when the pattern says “x sts and y rows to 4”, blocked. When I’m designing, the difference between these two measurements help me calculate the percentage between the blocked size and the width of my actual knitting. If I know the percentage difference between my unblocked and blocked sample, I can measure as I knit to be sure my knitting can be stretched to the correct size.
The reason I measure it again the next day is that fibers relax after they’ve been under tension – even cotton. When I’m making a garment, it’s important to know how much the fabric could relax – if it’s going to “snap back” a lot, I might want to make my garment in a larger size.
For the double-strand sample, I added another piece of play mat, because this swatch was more rectangular. Once my primary points were pinned, I laid the straight edge along the pins, and gently pushed the fabric out to the straight edge with my fingers.
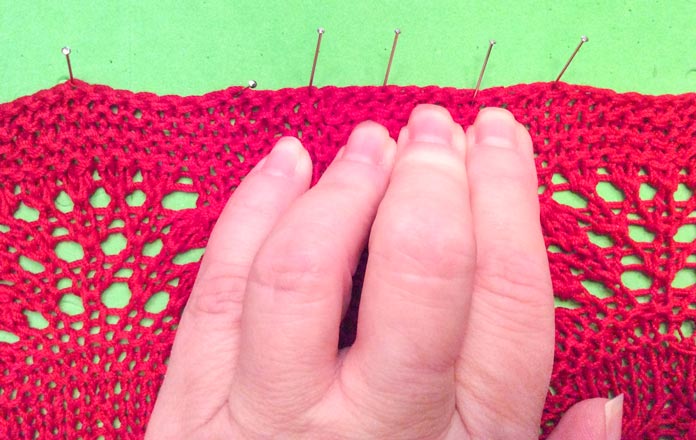
The edges of the double-strand sample were eased out to form a straight edge by pushing the cast on, cast off, and side edges gently out to form a line, then inserting the pins every half inch/ centimeter or so.
The double red sample measured 13″ x 5½” [33 x 14cm] before blocking. When I laid it out on the board, I tried to get it to go to 7½” on the blocking board, but it was too much, so I backed it off to 6¾” [17cm], and made the width 15″ [38cm]. When I measured it the day after I unpinned it, the finished dimensions were 14″ x 6½” [36 x 16cm] – that’s quite a bit of “snap back” which will be good information to have if I choose to begin testing the actual garment.
The red samples were made with a view to creating a lacy tunic with a sturdy yoke. The double strand sample could work for the yoke, but if I were to make the body of the tunic with 2 strands, my tunic could stretch out – if I really wanted to proceed with this sample, I’d want to add a couple repeats to it and hang it for a few days to be sure.
In addition to these samples, I also blocked the sample for the Horseshoe Wedding Bolero – you can see that sample in yesterday’s post.
Tomorrow, I’ll finish off the series with the pattern for that project.
This is part 4 of 5 in this series.
Go back to part 3: Knitting samples with Aunt Lydia’s Classic 10 crochet thread
Go to part 5: Aunt Lydia’s Metallic 10 goes to a wedding
[shareaholic app=”follow_buttons” id=”23784471″]