
The cardigan converted from Ribline Pullover in Cotton Supreme Waves is finally ready for assembly! Today’s post will cover a 3-needle bind-off, picking up stitches for the hem and neck band, and adding button bands instead of joining the center front.
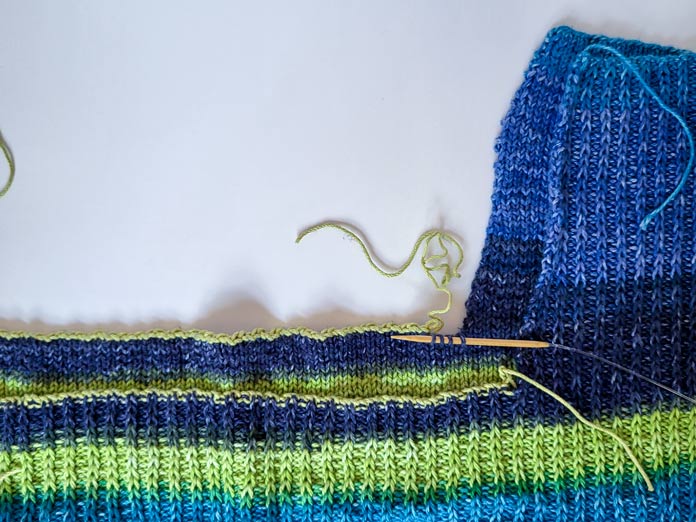
In yesterday’s post, I talked about how to color-match the yarn ends when starting a new ball of yarn. I also hinted that the provisional cast-on might not have been the best choice for the new stitches forming the sides of the body of the Ribline Pullover pattern. Now I’ll tell you why, what I did do, and what I could have done differently.
Removing waste yarn from provisional cast-on at sides of body to place stitches on needle.
So what did I do wrong with the provisional cast-on? I forgot that for the waste yarn to pull right out as easy as unravelling a row of crochet (or knitting) it has to be worked in all knit, or all purl. Definitely not any form of ribbing! Every time the yarn goes forward or back for the rib, it is wrapped around the strand of waste yarn. This makes pulling out the waste yarn nearly impossible. I ended up cutting it out with scissors, which worked just fine BTW. What I could have done was either: work the first row over the provisional stitches in just knit, instead of Slip Stitch Rib; or I could have chosen a different cast-on method.
Join the two side seams and center back seam of the converted cardigan with a 3-needle bind-off.
This method worked beautifully! To do: put right sides of two pieces together, with open stitches and both needles pointing the same way, and with the third needle bind off through the double layer as if it was one. If you would like to see a video tutorial click on https://www.instagram.com/reel/C3V2rCapPN9/?hl=en

A close up of 3-needle bind-off in action, showing a side seam being joined.
After joining the center back seam that connects the right half to the left half of the sweater and both side seams with 3-needle bind-off, the sleeve seams will still need to be sewn. I used mattress stitch and it zipped together perfectly. The knit stitch at each edge of the sleeve as directed in the pattern, made it very easy to sew. Until this point in the pattern instructions for the Ribline Pullover there had not been any differences between making a pullover or a cardigan.
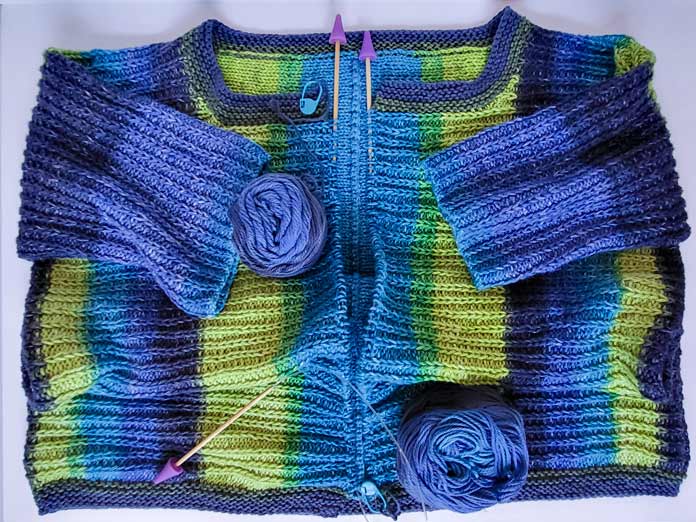
Assembled cardigan with hem and neckband completed, ready for button bands.
Next: the final modifications to convert the Ribline Pullover to a spring cardigan
Instead of joining the stitches from the right half to the left half at the center front, keep the stitches on hold. Then proceed to pick up stitches for the hem. There should not be much difference from the pattern as written, but I found it called for a few too many stitches.
Work Hem as follows: Beginning at the opening edge of the left front and RS facing, pick up and knit one stitch for every two rows along the entire bottom edge. Work 8 rows of garter stitch then bind off on WS row.
I used the same method for the Neckband: Beginning at opening edge of right front and RS facing, pick up and knit one stitch for every two rows and one stitch for every bound-off stitch along the entire neck edge opening. Work 8 rows of garter stitch then bind off on WS row.

Close up of right shoulder of cardigan showing neckband, buttonhole band, and the center back seam inside sweater.
Next is the Buttonhole Band. I found I had to use a much smaller needle than the rest of the pattern to get my garter stitch tension to match the Slip Stitch Rib. I used a 3.25mm circular needle.
Beginning at bottom of the hem at opening edge of right front and RS facing pick up and knit one stitch for each ridge of garter stitch from hem, then knit across held stitches of center front, and then pick up and knit one stitch for each ridge of garter stitch from the neckband. If you need a few more stitches or fewer stitches to space out your buttonholes evenly you can pick up extra or decrease in this row. My buttonhole band has 126 sts and I have 8, 18mm wooden buttons by Knit-One, to be spaced out. Work 4 rows of garter stitch then work the buttonholes on the next row (WS): K3, yo, k2tog, (k15, yo, k2tog) 7 times, k2. Work 3 more rows of garter stitch and then bind off on WS row.
The Button Band will be easy: With the same needles as Buttonhole Band, beginning at the top of neckband at opening edge of left front and RS facing follow the same instructions as Buttonhole Band but omit the buttonholes.

Close up of cardigan showing neckband, buttonhole band, and button band with button placement marked.
That concludes all the detailed modifications that you need to convert the winter style of Ribline Pullover into an uplifting spring cardigan made with UNIVERSAL YARN Cotton Supreme Waves. All that remains are the finishing touches! In my next and last post, I’ll show off the completed cardigan in real life, with lots of photos! I think you will agree the 3-needle bind-off at the center back seam really sets off the design!