
A soft, semi-fine yarn blending modal with cashmere makes a wonderful base for a breezy summer top. This post swatches for the right gauge, then knits the top in one seamless piece, from hem to neckline. A cardigan and a woven wrap round out the rest of the series.
The yarn
The yarn used is a modal-cashmere blend and weighs 3.5oz [100g] and holds 361yds [330m]. The recommended needle size is US 1 to 3 [2.25 to 3.25mm]. This gives a gauge of 27 to 32 stitches by 35 to 40 rows over 4” [10cm] in stocking stitch. Modal comes from beech tree pulp, so it feels breathable and soft. It also wicks moisture well, which suits it perfectly for warm weather knitting.
Swatch for the right fit
A few test swatches settle the details before casting on.
The first swatch confirms gauge. A US 3 [3.25mm] needle landed right on target after laundering.

The first swatch using Key Lime yielded a gauge of 26 sts and 35 rows after laundering, using a US 3 [3.25mm] needle.
A second swatch compares stitch patterns side by side, since seeing them together makes it easy to choose a favorite. For this top, a broken garter paired with a garter rib became the winning combination. Laundering swatches the same way as the finished project matters too, since it alone can shift gauge more than expected.

Pattern swatch going from bottom up – Broken Garter stitch, Garter Rib, a variation on Broken Garter stitch, and a Basket weave. Broken Garter and Garter Rib patterns are my favorites.
For this top, a broken garter paired with a garter rib became the winning combination. Laundering swatches the same way as the finished project matters too, since it alone can shift gauge more than expected.
Knit a top in one seamless piece
With gauge and pattern settled, it’s time for the star of the week: a breezy, seamless summer top. Download the free pattern here. The pattern knits flat in two pieces with shoulder and underarm seams. This version reworks it to knit in the round instead, with only the underarms left to sew.
Cast on with a US 2 [2.75mm] needle. Use two stitches fewer than the pattern’s combined front and back count. There are no side seams to allow for, so the smaller number works out fine. Work the half-twisted rib section at the bottom edge over two rounds. Round 1 knits one stitch through the back loop, then purls one stitch. Round 2 knits one stitch through the back loop, then knits one stitch plain. This substitutes a simpler twist for the trickier technique a flat pattern would otherwise require on every round.
Switch to a US 3 [3.25mm] needle once the ribbing is complete, and settle into the broken garter pattern. Round 1 knits one stitch, then purls three. Round 2 knits every stitch. Continue until the piece measures 14” [35.6cm], ending on round two. Then work one round in reverse to set a side marker at the halfway point.
Separate the front and back at the side marker. Move the back stitches to a spare needle while shaping the front. Cast on one stitch at the start of the row, work to the marker, then turn. Cast on one more stitch at the start of the next row. From there, cast on two stitches at the start of each of the next six rows. Work the bodice in a garter rib pattern as you go. This builds the sleeve width gradually as the fabric grows toward the shoulders.
Continue in the garter rib pattern up to the point where the pattern calls for dividing for the V-neck. Instead of casting off a middle stitch, work both sides of the neckline separately. Mark the shoulder point with a removable stitch marker rather than casting off.

Continuation of the Garter Rib pattern over the shoulder and down the back
Once the front is complete, continue knitting over the shoulder and down into the back panel. Cast on stitches for the back neck edge as the pattern directs. Work the garter rib pattern down the back to match the same row count as the front’s sleeve shaping. Then reverse the shaping into decreases instead of increases. Join the live back stitches to the held stitches using a three-needle bind off. This finishes the shoulder seam invisibly from the wrong side.
Finish the sleeve cuffs and neckline with a two-stitch I-cord cast off for a clean, rounded edge. Knit two extra stitches, then knit two stitches together through the back loop. Repeat until only two stitches remain, then bind off. Weave in the ends, and the top is complete. It’s soft, drapey, and finished with just two small seams at the underarms.
Substitute yarn for a cardigan
The next project substitutes this same yarn into a cardigan pattern originally written for wool, a bigger change than it sounds. Wool and this modal-cashmere blend behave differently on the needles, so the earlier swatching work becomes essential again here. A US 3 [3.25mm] needle matches both gauge and drape. The pattern’s original gauge, written for wool, called for a slightly smaller needle.
Two colors add visual interest throughout the garter stitch sections at the shoulders, hem, and cuffs. Alternating a main color with a contrasting color lets each shade highlight undertones in the other. A few small adjustments fit the design to personal preference, including longer sleeves and a single-color button band finished with an I-cord edge. Choosing buttons before knitting the buttonhole band avoids a common trap. Buttonholes sized for a stretchier wool fabric can end up snug on a less elastic yarn.
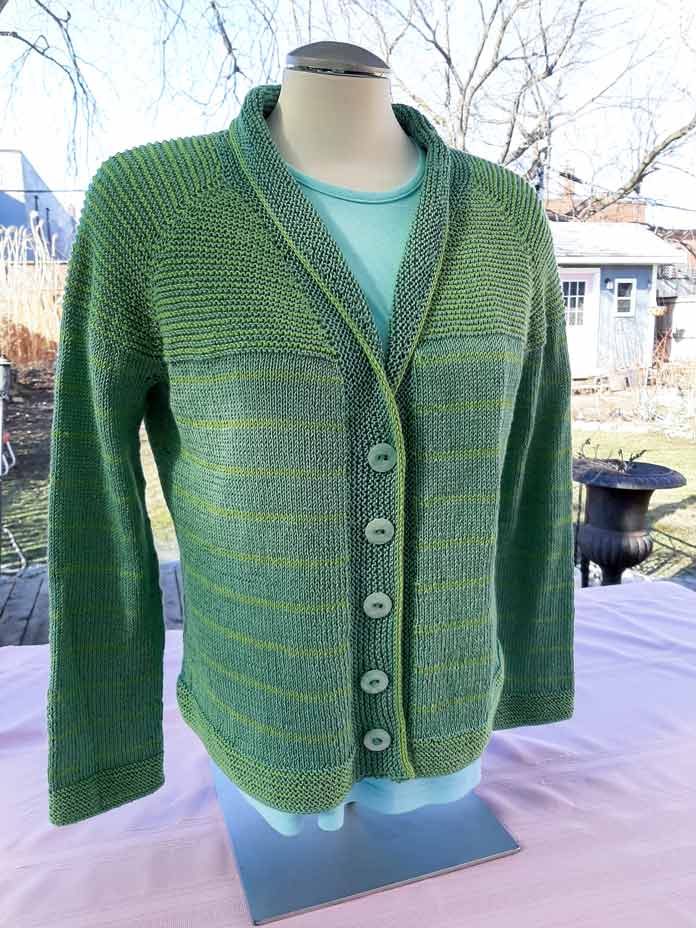
The Paulie cardigan is complete with buttons and made with Magnolia yarn in Citrus Leaf and Key Lime.