
This week I’m working with the Classic Shades family of yarns from Universal Yarns. Yesterday we looked at the details and qualities of Classic Shades Metallic. Today, I’ll share with you the top-down children’s cardigan I knit with it.
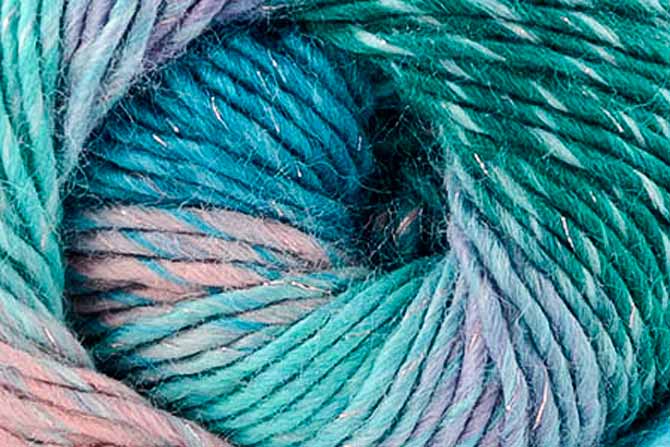
Close-up of skein of Universal Shades Metallic in the umbrella colorway
I used the Umbrella colorway, which features blues and greens from the aquamarine family, a little pink, and a little lavender. The metallic strand has a pink tinge to it.

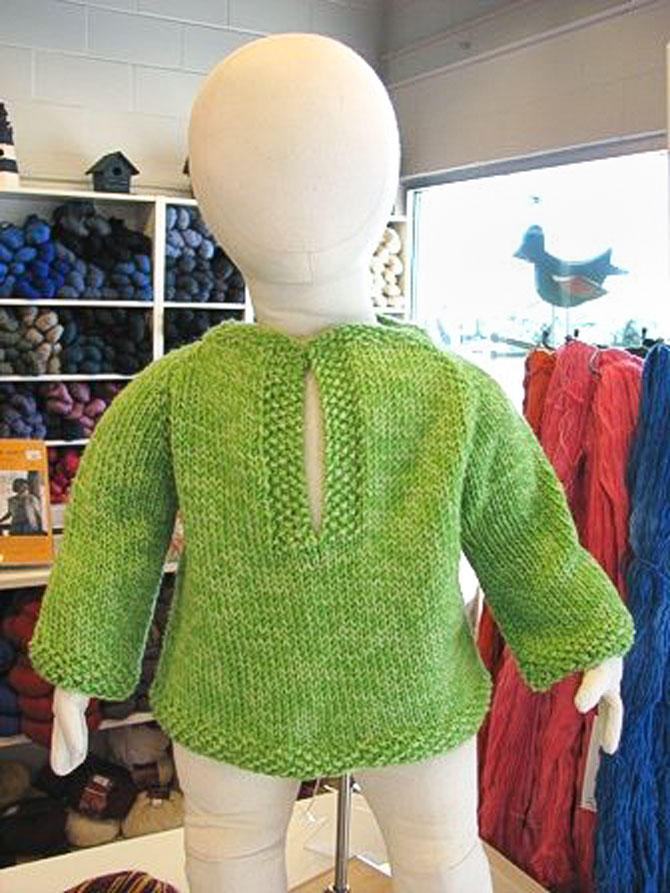
Top-down baby cardigan with edgings and closed button bands
There are lots of patterns for top-down raglan sweaters available for worsted weight yarn, and a lot of cute ones for kids, but when I saw this yarn, I did what I typically do when inspired by a yarn…I thought of what I’d like to knit and the person I’d like to have wear it. In this case, it’s a cute little friend of ours, the daughter of a family with whom my wife, sons and I have become good friends. The dad often razzes me about being a knitter, so I thought it would be fun to knit something for his daughter as a come-back.

1 year-old wearing a top-down hand-knit cardigan in Classic Shades Metallic
A testimony to how soft this yarn is, this little girl did not want to take this off, even when she left the comfortable air-conditioned space we were in when she tried it on. She was sweating and hot just before bed, but wouldn’t take it off. No itch-factor in this awesome Classic Shades Metallic.
As a designer, I rarely think of using someone else’s pattern, but I will when I just don’t have time to do the math. For this project, however, I just made things up as I knit. I’d like to share with you my steps, so you can knit your own top-down cardigan for a baby or toddler. Adult sweaters pose a few unique challenges, so we won’t go there… at least not this time.
I began with the measurement chart developed by the Craft Yarn Council of America (CYCA), my knitting gauge and the chosen chest size. Because I want the cardigan to fit over other clothing, I added 1″ to 2″ [2.5 to 5cm] to the chest measurement so the garment has some ease. For these wee, sweet sweaters, I don’t fuss too much over the width of the button bands — I usually just add ¾” [2cm] bands (or thereabouts) afterwards. I base the button bands the width of the buttons plus a little more.
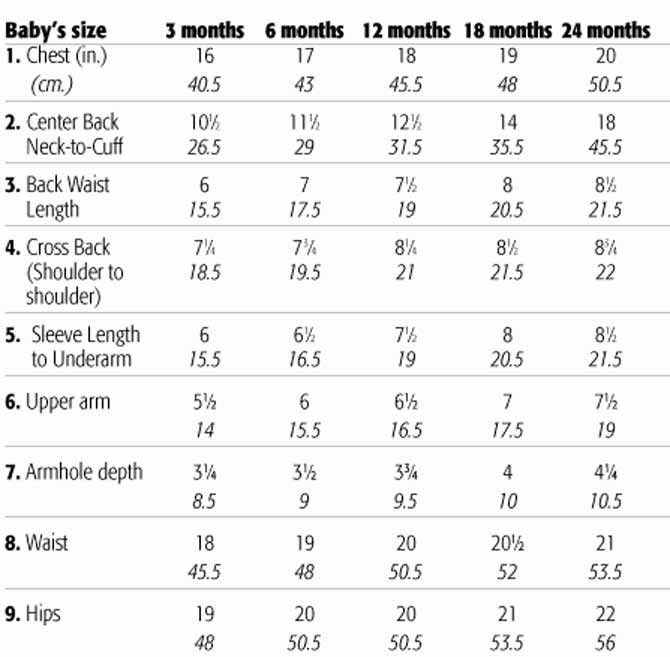
Excerpt of the baby and toddler’s measurement chart from the Craft Yarn Council
In this case, I want to knit a top-down cardigan for an 18-month old, so I use a chest size of 21″ [(53cm] — 19″ from the chart plus 2″ ease. If my gauge is 19 stitches over 4″ [10cm], I’ll need approximately 100 stitches. (19 divided by 4″ = 4.75 sts per inch. 4.75 times 21″ = 99.75 sts around the chest)
Children have large heads in proportion to their chests, so a decent neck opening is warranted. Elizabeth Zimmermann advocated having 40 percent of the body stitches at the neck, but I want to make sure there are no battles with edgings and buttons at that point, so, I make a fairly decent neck opening for my cast on. To calculate my cast-on for a toddler’s sweater, I use 45% of the body stitches. So, in my example, 100 sts x 45% = 45 sts. To keep the math easy, I round this up to the nearest multiple of 6…48 sts. It’s all a bit rough, as you can see, but it hasn’t really failed me yet.
So I’ll cast on 48 sts. Then, I need to figure out how many stitches I’ll need for the back, the two fronts, and the sleeves. I divide my cast-on of 48 by 6 (result 8) and put two parts for the back, one part for each sleeve, and two parts for the fronts. In my example, this gives me 8 stitches for each front, 8 stitches for each sleeve, and 16 stitches for the back. I place stitch markers to divide these sections and I’m ready to go.
First, I’ll do about 4 to 6 rows of some sort of edging stitch. In this case I worked k2, p2 across the wrong side rows and knit straight across on the right side rows.
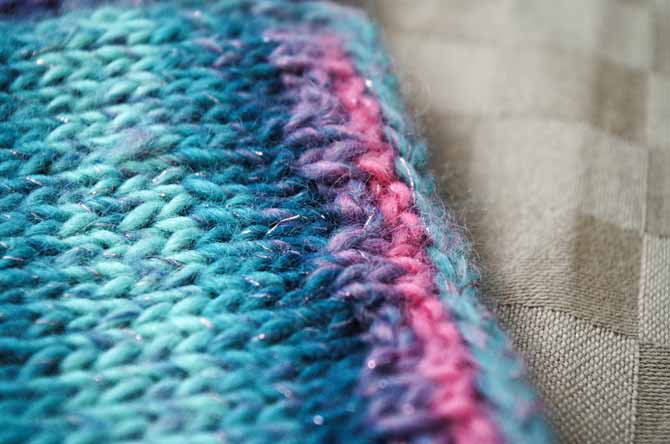
Close-up of neckline and waistband edging featuring k2 p2 one row and garter stitch on the next row for 4 or 6 rows
Then it’s time to start increase rows. I work an increase row of 8 stitches every second row, placing the additional stitches one before and one after each stitch marker. I work this increase row typically for about a total of 8 rows, alternating 4 increase rows with 4 plain rows. Then I change my increase rows as follows: I work a sleeve increase row where I only increase on the sleeve side of the markers (4 stitches increased); then a plain row; then an increase row with 8 increases (one on each side of every marker), and then a plain row. I repeat this until the section for the back is 4 or 6 stitches less than half of my intended body stitches. In my example, half of the back would be 50 sts, so I would keep the raglan increases going until I had 44 or 46 stitches between the stitch markers dividing off the back of the sweater.
Now, I divide the yoke for the sleeves and body by placing the sleeve stitches on stitch holders (I usually scrap yarn) and placing the stitches for the back and both fronts on one needle. When I work the first row, between the back and each front I cast on the extra 4 or 5 stitches under the arm — whatever I need to get the body to 100 sts. From there, I work the body as one piece to the desired length and then add an edging to match the neck.
Finally I work each sleeve. For kids, I like a ¾-length sleeve. I pick up 3 or 4 stitches from the ones I cast on earlier for the underarm of the body, then knit the sleeve stitches. I join them and work in the round, doing a decrease round of 2 sts under the arm every 4 or 5 rounds…until it looks right.
If you’re nervous about knitting this blindly (without a pattern), there are several lovely top-down raglan cardigans for children on Ravelry. Here are two that I found.

Easy top-down toddler cardigan with raglan sleeves
And here’s a pattern for a top-down raglan sleeve tunic.
Top-down hand-knit raglan tunic with polo collar neckline.
I think that either of these designs would look really cute knit up with Classic Shades Metallic, but I encourage you to design one of your own from my instructions. Please send me a comment about your adventures.
1 comment
I love the colors in the first few photos. So cute!