
If instant-gratification knitting is your thing, bulky recycled cotton tape yarn belongs in your stash. It knits up quickly, produces a soft, absorbent fabric, and comes in coordinating solid and marled colorways that make colorwork surprisingly simple. This post condenses five tutorials into one complete guide, covering the yarn itself, how to swatch and handle it, the gingham technique, a free baby play mat pattern, and a collection of quick household project ideas.
Imagine your little one playing on this mat in the shade of the crab apple tree! I made my mat 9 squares wide by 7 squares deep to ensure I had enough of the marled yarn on hand. The 7 x 7 version would be perfect for a small baby, and the 9 x 9 would be big enough for a child’s picnic blanket.
About the Yarn
This super bulky tape yarn is made from 85% recycled cotton and 15% recycled polyester. The construction is unusual: two strands of blended fiber are knitted into a loose 5-stitch i-cord, giving the yarn a flat, tape-like appearance with a soft, slightly textured surface. The recycled content makes it a responsible choice, and the cotton content makes it naturally absorbent.
The yarn comes in 8 solid colors and 8 marled colors. Many of the marls are made by combining one strand of each coordinating solid color within the i-cord construction. Because of this, a marled colorway placed next to its matching solid creates a classic gingham effect in the knitted fabric. This is explained in detail in Part 3.
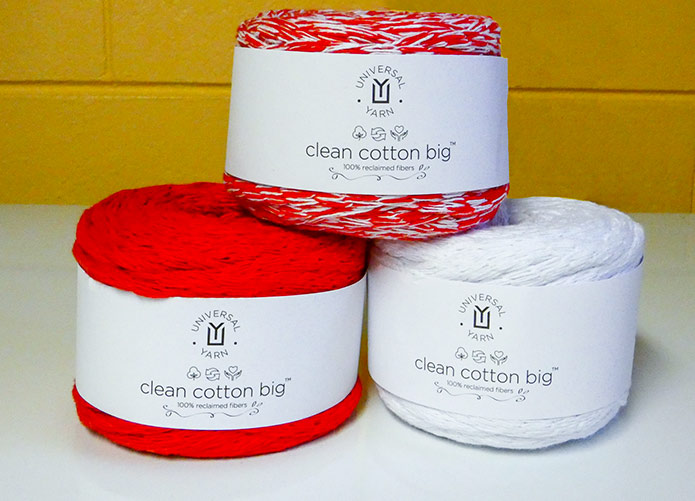
Clean Cotton Big comes in solids and “marls” which makes it possible to do easy colorwork.
Weight and gauge
The yarn falls into the super bulky weight category. The recommended gauge is 6 to 8 stitches and 10 to 12 rows per 4″ [10cm]. Suitable needle sizes range from US 15 to US 17 [10 to 12.75mm]. For a denser fabric, go with the smaller end of that range. For a softer, more open fabric, use larger needles.
If you knit in metric sizes, note that US 17 [12.75mm] sits between standard metric needle sizes. The nearest metric size below it is 12mm. The next size up is 15mm, which is likely too loose for most projects. When in doubt, swatch with a 12mm needle first.
Care
The yarn is machine washable and tumble dry safe. This makes it ideal for items that see regular use, such as bath mats, play mats, dishcloths, and other household textiles. For bath mat use, place a non-slip mat or non-slip spray underneath the finished piece for safety.
materials
yarn
- super bulky (weight 6) recycled cotton and polyester tape yarn: yardage varies by project (see individual project notes below)
needles
- US 15 [10mm] to US 17 [12.75mm] straight or circular needles, depending on project size and desired gauge
- a 12mm circular needle is a useful substitute for the US 17 [12.75mm] size in metric countries
notions
- blunt tapestry needle for weaving in ends
- scissors
- stitch markers
- non-slip mat or spray for bath mat use
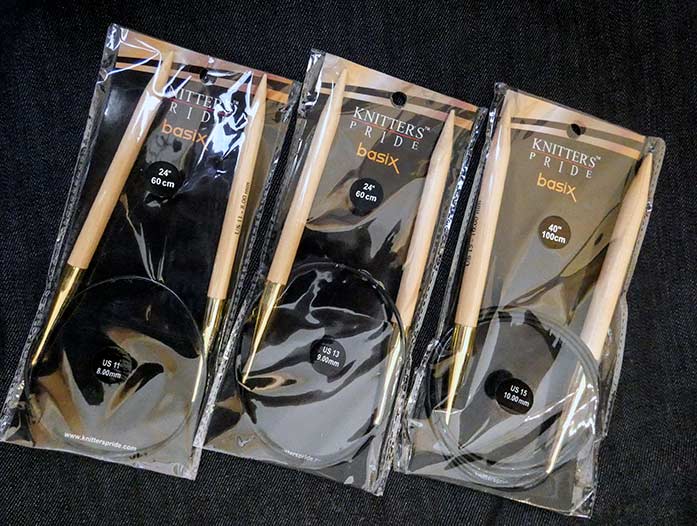
Knitter’s Pride basix needles have clear birch tips, gold tone ferrules and a black cable.
Swatching and Handling the Yarn
Before starting any project with this yarn, knit a gauge swatch. The tape construction knits differently from a standard round yarn. A swatch reveals how the fabric behaves at different tensions and how the gingham effect will look at your chosen gauge.
How to swatch
Cast on 20 stitches. Knit 4 rows of garter stitch to create a border that prevents the edges from curling. Then switch to stockinette stitch for the center 16 stitches, keeping 2 stitches in garter stitch at each side edge throughout. Continue until the swatch is about 4″ [10cm] long, then knit 4 more rows of garter stitch and cast off.
This swatch construction provides a stable, flat piece for accurate measurement. After measuring, the swatch can be repurposed rather than frogged. Use it to practice weaving in ends before starting the main project.
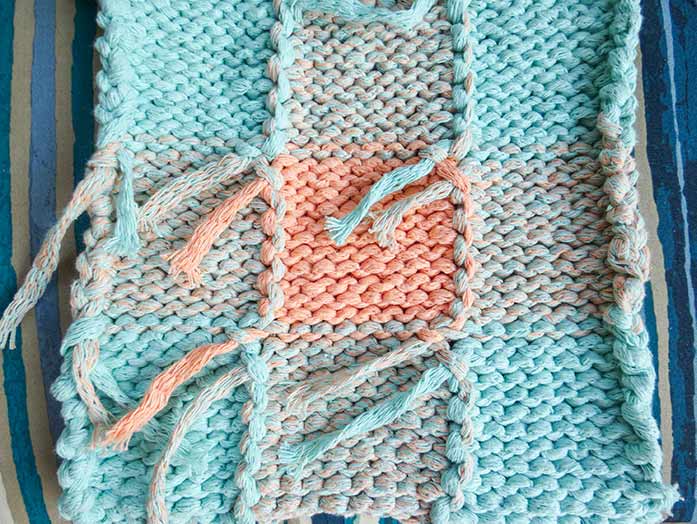
Before beginning the weaving in process, the ends of the yarn “lean” toward the adjacent color block
Weaving in ends
Weaving in ends with a tape yarn requires a slightly different approach than with regular yarn. Because the tape is flat and wide, standard weaving methods can create a visible lump on the right side of the work.
Instead, turn the yarn end to the wrong side of the work. Separate the individual strands of the tape by gently pulling them apart. Then use a tapestry needle to back-stitch each strand individually through the back of the fabric in different directions. Trim close after stitching. This distributes the bulk of the end across multiple stitches and keeps the right side smooth.
Practice this method on the gauge swatch before working on the actual project. It becomes quick and easy once the technique feels familiar.
The Gingham Technique
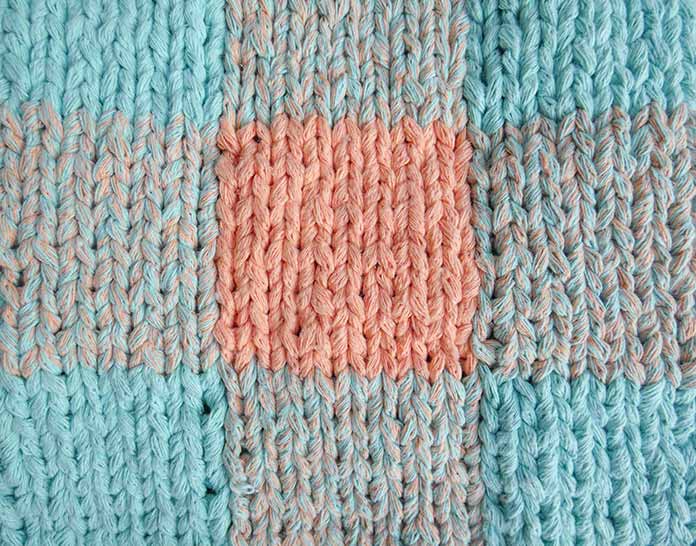
Gingham is a woven fabric with a checked pattern. The pattern forms where two colors of thread cross one another, producing solid squares of each color separated by squares that show a mix of both. This yarn recreates the effect in knitting, because its marled colorways are made from exactly the same two colors used in its matching solid colorways.
How gingham works in knitting
To knit gingham, you alternate between the solid color (color A) and the coordinating marled color (color B) in blocks of stitches and rows. Where color A appears, the fabric shows a solid square. Where color B appears, the marled construction shows both colors blended together, just as the crossed threads do in woven gingham. The result is a convincing gingham pattern without stranded colorwork or complex techniques.
The key to clean gingham squares is keeping block sizes consistent. A block of 8 stitches wide by 12 rows tall produces well-proportioned squares at this gauge.
Colorwork tips
- Carry the unused yarn loosely up the side of the work rather than cutting it at every color change. This reduces the number of ends to weave in.
- When switching colors, twist the yarns around each other on the wrong side to prevent a gap between blocks.
- Keep tension even when picking up a carried yarn after several rows. Pulling too tightly will pucker the edge.
- Work a small sample square before beginning the full project to confirm the gingham effect looks right at your chosen needle size.
When knitting intarsia, the key to a neat finish is to make sure the stitches at the color changes have the same tension as the stitches in the rest of the knitting.
Free Pattern: Gingham Baby Play Mat
This play mat uses the gingham technique described above. It is soft enough for a newborn, machine-washable, and quick to knit. The pattern includes a simple buttonhole fastening that allows the mat to fold into a tidy package for travel or storage.
finished sizes
- 7 x 7 squares: suitable for a small baby
- 9 x 7 squares: the size shown here (approximately 28″ x 22″ [71 x 56cm] before finishing)
- 9 x 9 squares: large enough for a child’s picnic blanket
materials
yarn
- color A: super bulky recycled cotton tape yarn in a solid color
- color B: the coordinating marled colorway
- approximate yardage: 2 to 3 balls of each color, depending on size chosen
needles and notions
- US 17 [12mm] circular needle, at least 24″ [61cm] long
- blunt tapestry needle
- 4 buttons, approximately 1″ [2.5cm] in diameter
- stitch markers
Gauge
- 6 sts x 8 rows per 4″ [10cm] in garter stitch (this is a relaxed gauge to keep the fabric soft)
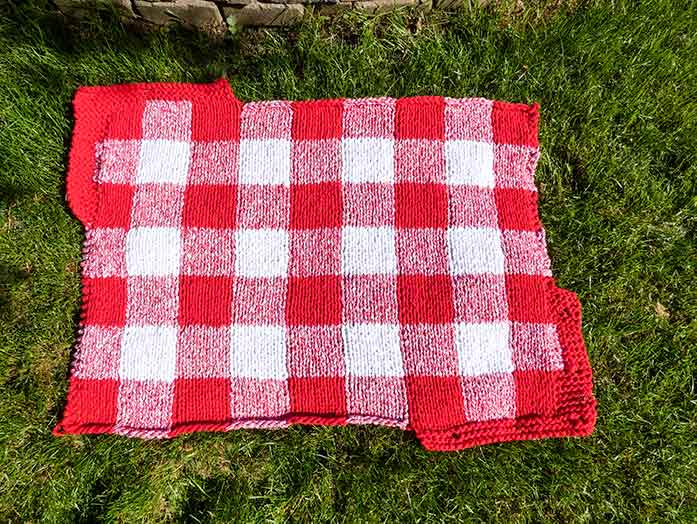
A bird’s eye view of the finished play mat, showing the borders on the bottom right and top left corners, and that amazing gingham effect!
Construction notes
The mat knits in one flat piece on circular needles (to accommodate the stitch count). Each gingham block is 8 stitches wide by 12 rows tall. Work blocks in alternating colors across and up the mat, changing color at the start of each new block row.
Work a 4-row garter stitch border across the cast-on edge before beginning the gingham blocks. After the final row of blocks, work 4 more rows of garter stitch before casting off. This border keeps the edges flat and adds a clean frame.
For the buttonhole fastening, work a simple yarn-over buttonhole on a designated row of the final gingham block. When the mat is folded, the exposed section of the mat forms a flap and the buttons align with the buttonholes for a tidy closure.
Folding and finishing
To finish, weave in all ends using the method described in Part 2. Then fold the mat in half lengthwise (wrong sides together) and fold again widthwise. Match the edges and mark button placement on the top flap. Sew buttons securely in place. The folded mat is compact enough to tuck into a bag or nappy caddy.
More Projects to Knit with Bulky Cotton Tape Yarn
The gingham technique and fast knitting speed of this yarn open up a wide range of household projects. Here are several ideas, all adapted from the same gauge and technique base.
Gingham bath mat
To make a bath mat, use the same block size as the play mat (8 stitches by 12 rows per block) and the same US 17 [12mm] needles. Work a 4″ [10cm] plain garter stitch border all around the outside of the gingham area. A 5 x 4 block arrangement produces a mat that suits most bathroom floor spaces. Place a non-slip mat underneath before use.
Dishcloth or dish drain cloth
For a smaller project, cast on 20 stitches on US 15 [10mm] needles. Work in garter stitch throughout for a firm, absorbent cloth that lays flat. A single ball of yarn yields several cloths. These make practical and thoughtful handmade gifts.
Loop stitch oven mitt
The loop stitch creates a fluffy, protective texture well suited to oven use. Cast on 12 stitches. Work a loop stitch section for the mitt body, then add a short-row shaped cuff that stretches over the hand.
Loop stitch: insert the needle into the next stitch, loop the yarn over your left index finger and also over the right needle tip, draw both loops through the stitch together, then knit through the back loop of the resulting stitch to secure the loop. On return rows, knit through the back loop of every stitch.
For the cuff: cast on 5 additional stitches. Work the 5 cuff stitches in garter stitch and the original 12 stitches in loop stitch for several rows. Then work short rows on the cuff stitches only to build the curved shaping that allows the cuff to stretch over the hand. Cast off all stitches, sew the side and fingertip seams, and weave in ends.
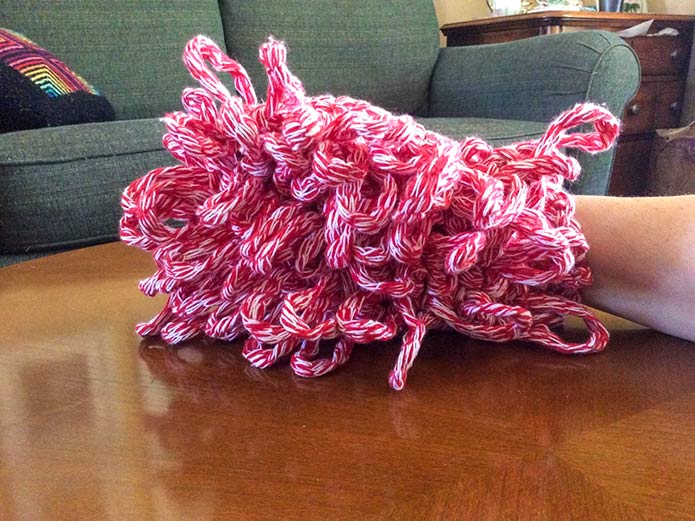
I had just over a ball of the red-and-white Sailboat yarn leftover from the play mat. I made this loop-stitch duster with just a few yards to spare!
A note on project selection
One important observation from swatching: this yarn is not well suited to structured bag construction. The tape fabric has a loose drape that does not hold a bag shape well. For functional bags, a firmer yarn with more body works better. For all flat household projects such as mats, cloths, and mitts, this yarn is an excellent choice.
Final Thoughts
Recycled cotton tape yarn is a rewarding material to work with. It knits quickly, feels soft, and makes excellent use of its coordinating colorways to create simple, striking gingham patterns. The play mat is a satisfying weekend project. The household items that follow from the same technique are quick enough to make in an evening.
Try it on US 15 [10mm] needles for a firmer fabric and US 17 [12mm] needles for a softer one. The difference is significant, so a quick swatch is always worth the time.