

Swatch Photo 1
In this mini blog series, I’m excited to be exploring textures in knitting. We will look at a variety of ways to make the surface of your knitting have something that draws in the eye to a particular point or area of interest. We will start with bobbles and continue with mid-row bind off textures, twisted stitches, knots and bumps, and a few others.
Many knitters love to hate on bobbles but a few really do like them. In my 38 years of knitting I haven’t met many of the latter. People dislike bobbles because they’ve never really learned how to make them and they seem ‘hard’ to do. Or they dislike them because they’ve been forced to wear sweaters with bobbles with rather unfortunate placements in the design. Still, others dislike bobbles because they take so long to make, what with the stop and increase, and turn, and purl, and turn, and knit, and turn, and decrease. It really feels like your flow across the row is interrupted.
When I work on color work or cables, the next stripe or fairisle motif or cable crossing are a little like dangling carrots, the motivation to slog through the rows of stockinette or moss stitch. I want to get to them and work those design features to see how they make the piece I’m working on complete. But when it comes to bobbles, and it’s a bobble row, all of a sudden that sink full of dishes or that unwound hank of yarn beckons to set my knitting down and leave those bobbles for a later time. Do you ever feel like that? Like bobbles are an inconvenience?
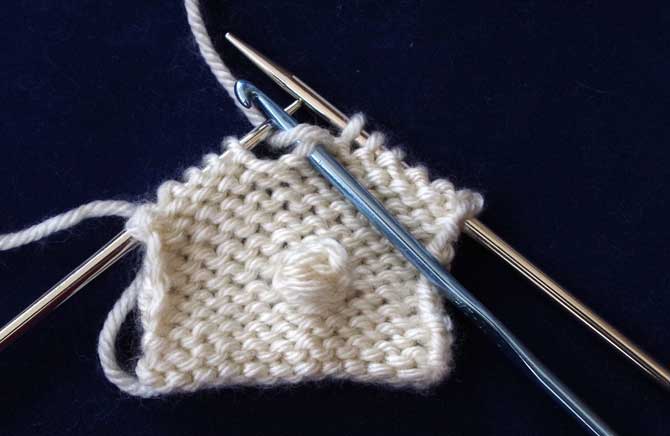
I’ve found a very nice alternative to the knit bobble that makes knitting bobbles a pleasure instead of a headache. Purists would say that these happy little bumps aren’t bobbles at all, because, well, they’re not worked with your knitting needles. They are worked ingeniously with a crochet hook. So, technically speaking, they aren’t bobbles at all and if you look at the accompanying picture of my swatch (see swatch photo 1), they look a little less bulky, and slightly more subtle. So I’m naming them “rosettes” instead.
If you look at these rosettes, you don’t even have to squint or really stretch your imagination at all to see that they do resemble little roses. I’ve placed these inside diamonds made with twisted stitches to give them a little nest of their own, but they look equally lovely on a background of reverse stockinette.
To work the rosette in the indicated stitch, you place that stitch on your crochet hook (it should be the same diameter as your knitting needles or one size smaller). With the hook, you make a yarn over the hook counter-clockwise—in other words bringing the yarn from the back of the work up and over the hook and return it to the back of the work (see yarn over hook photo)—and draw that yarn over through the stitch on the hook. In crochet, that’s called a chain. You work 2 more of these chains (see 2 chains photo).
Yarn over hook

Two chains
Then you do the following set of moves twice: yarn over, insert hook in first stitch—the one at the base of the chains—yarn over and draw up a loop (see 5 strands photo).

5 strands on hook
Third, you do one more yarn over and draw through all the loops on the hook, chain one more and place the stitch back on the right needle (see right needle photo). Now you can proceed across the row. Writing it out, reading it, and trying it may seem like a long chore, but these will soon be very quick to make with a little practice, and easier than knitting bobbles like usual.

Returned to right needle
If the bobble seems to want to poke it’s way to the back of the fabric, you can simply push it through to the right side, pull on it a bit, fluff it up and it’ll stay. Blocking always helps too. For this swatch I used Bernat’s worsted weight Canadiana in Aran and I just dunked the swatch in a bowl of just-boiled water for a two-minute soak, and then I gently absorbed the extra moisture with a towel and pinned it out to dry.
Crocheting rosettes is a quick and simple solution when you want to have a slightly less pronounced version of the traditional knit bobble. I hope seeing a bobble coming up in the next row of your knitting will motivate you to press on and work it quickly with this technique.
Another day this week, we’ll look at this same swatch and discuss the twisted stitches and the ladder stitch you see here framing the bobbles.
2 comments
Cool! I’m anxious to give it a try. I like bobbles but I’ve been mostly dissatisfied with the finished affect.
Thanks heaps
I’ve been knitting for 61 years this proves you can teach old dogs new tricks
That is so encouraging for all of us Josie! Thank you!